A kitchen without cabinets isn’t a design failure — it’s a blank wall waiting to be used. The best small kitchen storage ideas without cabinets treat every vertical surface, counter inch, and square foot of floor as a real storage opportunity. Whether you’re renting, working with a stripped-down galley, or starting completely from scratch, this guide covers 11 practical solutions, a full cost breakdown, and the planning framework most people skip — the same one that stops you from buying storage that makes the problem worse, not better.
Key takeaways:
- Wall-mounted solutions — pegboards, floating shelves, magnetic strips — deliver the most usable space per dollar
- Rolling carts work as both extra storage and additional prep surface
- Renters can use adhesive-mounted and freestanding options without touching a single wall
- Going vertical, up rather than outward, is the core principle in any cabinet-free kitchen
- A three-layer planning method (detailed in the framework section below) prevents buying storage that backfires
Why small kitchen storage without cabinets needs a different plan
Strip out the upper cabinets and the problem inverts: exposed walls, higher clutter risk, and no built-in place to conceal anything. Small kitchen storage ideas without cabinets work best when they replace the function of cabinets as a system — not as a random collection of organizers bought one at a time without a plan for the whole space.
What actually changes when you lose the cabinets
Walls in most kitchens run unused from about 18 inches above the counter to the ceiling — easily 3 to 4 feet of vertical space most people walk past daily. Wall-mounted systems reclaim that zone entirely. The trade-off is visibility: everything you store is on display, which means editing what actually lives in the kitchen matters far more. Less stored means less seen.
11 small kitchen storage ideas without cabinets
These solutions cover every budget, including fully damage-free options for renters. Each one includes the specific measurement, material, or placement rule that makes it work in practice — not just sound useful on a list.
1. Open floating shelves
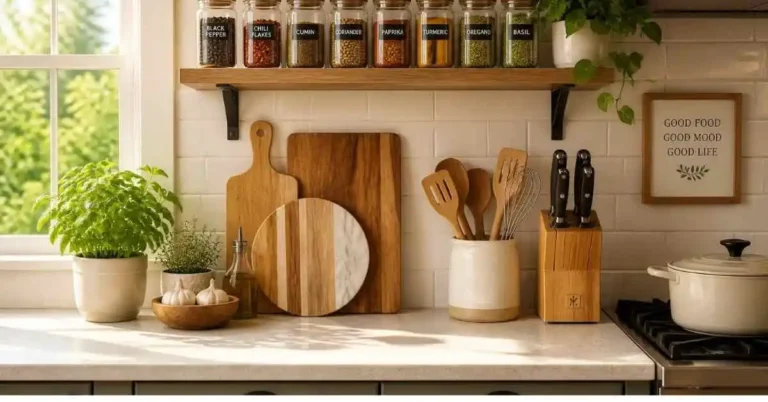
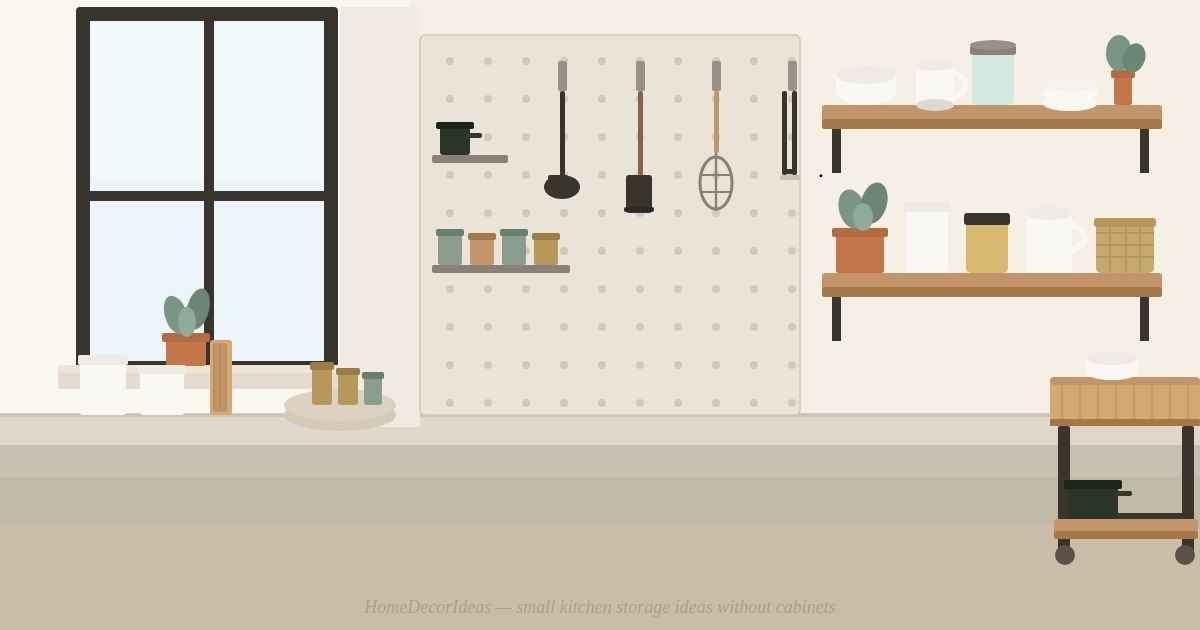
Mount two or three shelves 14 to 18 inches apart — that gap fits a standard dinner plate upright — and you hold as much as an upper cabinet without the door. Group items by material or color and keep each shelf at about 70% capacity. That remaining 30% is visual breathing room, and breathing room is what makes open storage look curated rather than crammed. For lease-restricted walls, adhesive bracket systems rated for 30 lbs or more handle everyday ceramics and glassware without permanent marks.
2. Pegboard wall panels
A 2×4 foot pegboard panel is one of the most reconfigurable small kitchen storage ideas without cabinets. Hooks, small shelves, and bins clip on without tools and rearrange in minutes. Mount the panel between 48 and 60 inches from the floor so utensils hang in comfortable reach with zero counter footprint.
Pro tip: Paint the pegboard before installing. Matte white disappears into most kitchen walls. A warm sage or soft terracotta makes it a deliberate design element rather than a utility afterthought — and looks far better than unfinished brown hardboard.
3. Slim rolling kitchen cart
A cart 12 to 14 inches wide fits the gap between a refrigerator and a wall without blocking any traffic flow. It adds prep surface and lower-shelf storage simultaneously, which makes it the most versatile single purchase in a compact kitchen organization project. Roll it to wherever you’re working, push it back when you’re done. For renters especially, this is often the highest-return buy on this entire list.
4. Magnetic knife strip and spice tins
A 24-inch magnetic knife strip holds 8 to 10 knives and removes the knife block from the counter entirely. Adhesive-backed versions stick to painted walls or tile without drilling. Pair the strip with small round magnetic spice tins — 4 oz tins attach directly to the strip — and the entire spice collection shifts to vertical wall storage in one move.
5. Over-the-door organizers
The inside face of a pantry door or kitchen door is genuinely usable storage. Over-door racks with adjustable shelves hold aluminum foil, parchment paper, cleaning supplies, cutting boards, and snacks — all the items that usually end up piled somewhere inconvenient. No holes, no tools, no lease concerns.
6. Tension rod dividers under the sink
Two vertical tension rods create distinct compartments for bottles and cleaning products under the sink. A horizontal rod near the front holds spray bottles by their triggers, freeing the shelf space below them. Total cost: under $10. Total time: about five minutes.
7. Ceiling-mounted pot rack
An oval pot rack spanning two ceiling joists removes the most awkward-to-store items from the kitchen permanently. Standard racks hold 8 to 12 pots and pans on S-hooks. The NKBA recommends at least 72 inches of clearance from the floor to the lowest hanging item for safe daily use. This is a homeowner option — most rental leases prohibit ceiling drilling — but for those who can use it, it frees more floor and counter space than almost anything else on this list.
8. Freestanding pantry or baker’s rack
A freestanding pantry unit, 18 to 36 inches wide, replaces a full wall of upper cabinets in one piece and moves with you when you leave. A baker’s rack does the same job with more airflow, making it better for produce and bread. Apply the same curation approach you’d use for open kitchen shelving — group by category, leave breathing room between groups, resist filling every inch.
9. Stackable bins and drawer organizers
Any drawer in a cabinet-free kitchen is working harder than it looks. Stackable bins turn one shallow, chaotic drawer into two organized layers. Bamboo or clear acrylic inserts with distinct compartments for cutlery, utensils, and small gadgets cut searching time immediately. And if you have even a single base cabinet, this is the fastest way to stretch the enclosed storage you already have.
10. Countertop canisters and a lazy Susan
Clear glass or matte ceramic canisters for dry goods — pasta, rice, flour, coffee — look organized only when they’re consistent. Choose one material and one lid style throughout. Mixed sizes work; mixed materials always read as disorganized, no matter how neatly the contents are packed. Add a 12-inch lazy Susan in a corner or on a shelf and back-of-shelf items become reachable without moving anything in front of them.
11. Woven baskets on open shelves
Baskets solve the display problem for things that don’t look good in the open: plastic bags, cleaning cloths, rarely-used gadgets. A lidded seagrass or rattan basket on an open shelf contains them invisibly while adding natural texture. One detail that matters more than expected: a basket that overhangs the shelf edge even slightly looks precarious. Fit it flush with a few millimeters of clearance and it looks considered.
Budget breakdown: what each solution actually costs
These are realistic cost ranges across all eleven solutions — rental compatibility and best use case included.
| Storage solution | Approx. cost | Rental-safe | Best for |
|---|---|---|---|
| Open floating shelves | $20–$80 | With adhesive anchors | Dishes, jars, cookbooks |
| Pegboard panel (2×4 ft) | $15–$50 | Freestanding frame available | Utensils, tools, small pots |
| Slim rolling cart | $30–$150 | Yes | Prep surface + extra storage |
| Magnetic knife/spice strip | $15–$40 | Yes, adhesive versions | Knives, spice tins |
| Over-door organizer | $10–$35 | Yes | Pantry goods, cleaning supplies |
| Freestanding pantry | $60–$200 | Yes | Dry goods, small appliances |
| Ceiling pot rack | $50–$150 | Usually not | Pots, pans, colanders |
| Tension rods (set) | $5–$15 | Yes | Under-sink organization |
Before spending anything, check these off:
- Measure wall space from counter to ceiling and note any outlets or switches that break up the usable surface
- Write down what you actually use daily versus weekly or less — the list is usually shorter than you expect
- Confirm renter or owner status, since this immediately removes or opens specific solutions
- Choose one dominant material palette — wood, metal, wire, or woven natural — for visual consistency across all storage pieces
- Identify your single biggest frustration: not enough counter space, no dry goods storage, or nowhere for large cookware
How to plan your budget
| Budget tier | Approx. spend | Where to start |
|---|---|---|
| Low | Under $50 | Pegboard, hooks, tension rods, two woven baskets |
| Mid-range | $50–$150 | Rolling cart, floating shelves, magnetic strip |
| Premium | $150–$300+ | Baker’s rack, full pegboard setup, ceiling pot rack |
Work through the Wall layer first — pegboard, floating shelves, magnetic strip — then add Floor-layer pieces. Surface organization is the least expensive and easiest to adjust, so do it last.
The Surface-Wall-Floor method — and a real kitchen that used it
Most storage problems in cabinet-free kitchens come from buying reactively: one basket here, one shelf there, with no model for the whole space. The Surface-Wall-Floor method maps your kitchen into three distinct storage layers before you spend a cent, which is why a structured approach almost always outperforms a random one.
Surface layer (countertops): Daily-use items only live here. Clear everything off the counter first, then return only what you touch every single day. Anything less frequent belongs in the Wall or Floor layer.
Wall layer (vertical surfaces): This is the highest-value storage real estate in a cabinet-free kitchen. Pegboards, floating shelves, magnetic strips, and over-door organizers all operate here. Most kitchens offer 3 to 4 feet of usable vertical height above the counter — more storage volume than most upper cabinet systems when used deliberately.
Floor layer (below counter height): Rolling carts, baker’s racks, and freestanding pantries go here. This layer handles the bulkiest items — large pots, stand mixers, bulk dry goods — that can’t go on a wall without heavy structural anchors.
A real 8×10 rental kitchen for $140
One galley-style rental kitchen: 8 feet by 10 feet, no upper cabinets at all, roughly 12 linear feet of usable wall above the counter. The Surface-Wall-Floor method, applied over one weekend, total spend of $140.
Wall layer first: two 2×4 pegboard panels on a freestanding frame ($38 total) moved every utensil off the counter. A 24-inch adhesive magnetic strip ($22) removed the knife block entirely.
Floor layer next: a 12-inch rolling cart ($65) added both prep surface and lower-shelf pot storage.
Surface layer last: three matching glass canisters ($15) replaced loose bags of flour, rice, and pasta on the counter.
Result: 18 inches of clear counter space gained, every utensil accessible without opening a drawer, and room for two people to cook simultaneously. For the same method applied beyond the kitchen, the small-space storage ideas guide at HomeDecorIdeas covers each room in sequence.
Mistakes that make cabinet-free kitchens feel more cramped
The most common reason a cabinet-free kitchen still feels disorganized isn’t a shortage of solutions — it’s the wrong solutions applied in the wrong order, or storage added before the underlying clutter problem is addressed.
Mixing storage materials without a plan
A wicker basket next to a chrome wire rack next to a white ceramic canister reads as clutter, even when each individual item is tidy. Pick two materials — natural wood and matte black, for example — and buy every storage piece in those two finishes only. It takes one upfront decision and eliminates the “organized but still messy” problem entirely.
Buying storage before editing
Every organizer fills up faster than you expect. Installing shelves without removing the excess first doesn’t solve anything — it gives clutter a better address. Pull everything out of the kitchen. Return only what you’ve used in the past month. Most people find they need 30 to 40% less storage than they originally thought.
Reader objection — “Won’t open shelves always look messy?” Only when they’re overcrowded. Load a shelf to around 70% capacity, group items by color or material, and leave deliberate gaps between groupings. The empty space is what reads as organization — not the number of items on display. The kitchen decor ideas guide walks through the editing process step by step.
Reader objection — “I rent. I can’t put holes in my walls.” Adhesive shelves, freestanding pegboard frames, over-door organizers, rolling carts, and freestanding pantry units require zero wall damage. Six of the eleven ideas on this list are fully renter-compatible. The constraint is real, but it eliminates far fewer options than most renters assume.
FAQs
How do I store pots and pans without kitchen cabinets? A ceiling-mounted pot rack is the most space-efficient permanent option for homeowners. For renters, a baker’s rack or the lower shelf on a rolling cart handles most cookware without any wall mounting. A compact two-tier rack near the stove keeps four to six pots accessible without installation.
What can I use instead of kitchen cabinets? Open floating shelves, freestanding pantry units, and baker’s racks are the closest functional replacements. Together they cover what upper cabinets, lower cabinets, and a pantry would each handle — at lower cost and with the flexibility to move everything when you do.
Can a kitchen actually function without any cabinets? Yes. Many intentional minimal kitchens work entirely on open storage and freestanding units. The key is strict editing — store only what you use regularly — and treating wall space as the primary storage zone rather than the counter or floor.
What’s the best no-drill wall storage option for renters? Adhesive-backed magnetic strips and peel-and-stick bracket systems rated for 20 lbs or more add real functional storage without permanent marks. Freestanding pegboard frames sit on the floor with no wall contact at all and rearrange just as easily.
How do I organize a kitchen that has almost no storage space? Apply the Surface-Wall-Floor method: clear and organize countertops first, add wall-mounted solutions second (pegboard and floating shelves give the most return per dollar), then bring in floor-level freestanding units. Edit ruthlessly before buying — most tight kitchens have enough physical space once they contain fewer items.
What a functional cabinet-free kitchen actually looks like
The eleven solutions in this guide work individually, but they work best as a coordinated system built around the Surface-Wall-Floor method. Start with what’s cheapest and fastest — a pegboard panel, tension rods under the sink — see the result, and build from there.
Cabinet-free doesn’t mean storage-free. It means your storage is visible, which is an invitation to make it look good.
Unlock the power of knowledge—explore our main collection that tackles life’s real questions.