
Most budget decor advice reads like it was written by someone who has never held a paint roller. You get told to “add throw pillows” and “hang art” while your rental still looks like a beige box. The real problem isn’t money. It’s that nobody explains which cheap changes read as “designed” and which read as “student housing.”
Here’s the direct answer: the best DIY home decor on a budget swaps out lighting, softens hard surfaces with textiles, and adds one high-contrast paint or paper accent per room. Do those three things and a room reads as intentional, even if you’ve spent under $100 total. Everything else is a bonus.
I’ve styled small rentals, first apartments, and one very tired 1970s living room over the past several years, and I’ll show you which projects punch above their price and which ones waste a weekend. There’s also one mistake in the last section that I see in almost every budget makeover, and it’s the reason so many DIY rooms still look flat.
Key takeaways:
- Lighting is the highest-ROI budget change in any room. Swap a single 4000K overhead bulb for a 2700K warm one and the room feels different that night.
- A gallon of paint (roughly $30–$45) covers a full accent wall and can shift a room’s entire mood.
- Textiles do heavy lifting. A layered rug, one curtain upgrade, and two textured cushions read as a styled room.
- Removable wallpaper and peel-and-stick tile give renters permanent-looking upgrades without deposit risk.
- Thrifted frames, secondhand lamps, and free printable art beat mass-market wall decor for character and cost.
- The 3-Layer Budget Rule (below) tells you exactly where to spend your first $50, $50 to $150, and $150+.
Why budget decor usually looks cheap (and how to fix it)
Budget decor looks cheap when it copies expensive decor at half quality. A $12 faux ceramic vase next to a $15 faux plant next to a $20 faux painting reads as three plastic objects, not a styled shelf. The fix is to use fewer items, but make each one either genuinely textured, genuinely handmade, or genuinely secondhand.
Real materials at any price beat fake materials trying to look premium. A thrifted stoneware bowl for $4 has more presence than a $22 resin “ceramic-look” bowl from a big-box store. Your eye reads the surface before it reads the shape.
The three signals of expensive rooms:
- Layered lighting at different heights (never a single ceiling bulb)
- Contrast between textures (linen against wood, ceramic against woven, matte against glossy)
- Negative space (empty surfaces are a design choice, not a failure)
Budget makeovers that ignore these three things stay looking cheap no matter how many pieces you add. Keep them in mind before every purchase.
Common materials worth the money
Not every material rewards a low price. Some read as premium even at thrift-store cost. Others always look plastic. This is where to spend, and where to skip.
| Material | Budget-friendly? | Why |
|---|---|---|
| Solid wood (secondhand) | Yes | Ages well, sands and refinishes cleanly |
| Rattan and cane | Yes | Natural texture reads as intentional at any price |
| Linen (even blends) | Yes | Drapes and diffuses light better than polyester |
| Stoneware and terracotta | Yes | Weight and imperfection signal handmade |
| Jute, wool, and sisal rugs | Yes | Texture holds up; polyester rugs shine unnaturally |
| Faux leather | No | Cracks and peels within a year |
| Resin “ceramic” décor | No | Reads plastic under any light |
| Thin veneer particle board | No | Chips, swells with moisture, no repair path |
| Faux plants (most) | Mixed | Only quality silks pass; plastic ivy always fails |
19 budget DIY projects that actually work
These are ranked by impact-per-dollar, not by ease. Every one has been tested in a real room, with real dimensions, on a real weekend. Pick two or three per space; you don’t need all nineteen.
1. Swap every overhead bulb to 2700K warm white
This is the single cheapest upgrade in this list and the one with the biggest immediate payoff. Most rental fixtures ship with 4000K or 5000K bulbs that make skin, wood, and fabric look cold. A four-pack of 2700K LEDs runs $8 to $14. Do the whole apartment in one afternoon. You’ll notice the difference before you even hang anything else.
2. Add two table lamps to any main room
Overhead-only lighting flattens a room. Add two lamps at different heights (one on a side table, one on a console or shelf) and the room gains depth. Thrifted lamps run $5 to $20 each; even a plain white shade from a discount store works if the base has shape. Aim for 40–60 watt equivalent bulbs, still 2700K.
3. Paint one accent wall in a moody color
A gallon of quality interior paint covers about 350–400 square feet, which is more than enough for one accent wall in most rooms. Choose a color three to four shades darker than your main wall, not a totally different hue. Warm charcoal, deep olive, terracotta, and inky navy all photograph well and hide scuffs. Expect $30–$45 in paint and $8–$12 in supplies.
4. Install peel-and-stick wallpaper on a small feature area
Removable wallpaper works best on small surfaces where the pattern reads without overwhelming: a powder-room wall, the back of a bookshelf, an entryway strip, or the ceiling above a bed. A single 20-square-foot roll runs $25 to $40 and, if applied to clean, primed drywall, comes off in a year or two without damage.
5. Layer a small textured rug over a larger flat one
The layered-rug trick reads as designed even in a rental. Start with a flat jute or sisal rug in the largest size that fits (a 5×8 works in most living areas). Layer a smaller patterned or high-pile rug at an angle on top, positioned under the coffee table. Total cost with secondhand or discount pieces: $60–$120.
6. Frame free printable art in thrifted frames
Museums, national galleries, and public-domain art sites offer thousands of free high-resolution downloads. Print at a local copy shop on matte paper (roughly $3–$8 per 11×14). Hunt thrift-store frames in one afternoon, spray-paint them a single unifying color, and you have a gallery wall for under $40.
7. Replace cabinet and drawer hardware
New knobs and pulls change a kitchen or dresser faster than paint. A set of eight matte black or aged brass pulls runs $16 to $30 online. Measure the existing hole spacing before you buy (typically 3, 3.75, or 5 inches center-to-center). The installation is one screwdriver and twenty minutes.
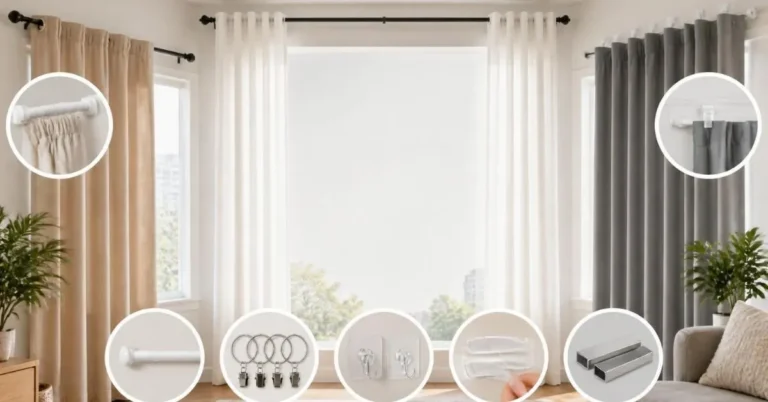
8. Add a curtain rod that’s wider and higher than the window
Standard-issue curtain rods hung tight to the window frame make rooms look shorter. Extend the rod 6–10 inches past each side of the window, and mount it 4–8 inches above the frame (or all the way to the ceiling in low rooms). Curtains should just kiss the floor. Total: rod plus curtains, $30–$70 per window.
9. Build a picture ledge from a $6 shelf
A single 24- to 36-inch floating shelf, mounted at eye height, becomes a gallery ledge for framed prints, small ceramics, and one leaning branch. This works better than nailing individual frames because you can swap the display in seconds. Shelf plus brackets: $8 to $18.
10. Repaint a thrifted wood piece in a saturated color
A $15 side table or nightstand from a resale shop, sanded lightly and painted in a saturated color (deep green, mustard, oxblood), instantly reads as a designer piece. Use a foam roller for smooth finish and two thin coats. Total including paint and primer: $25–$40.
11. Add crown molding with a peel-and-stick trim
Foam or PVC crown molding in peel-and-stick form runs about $8 to $12 per 4-foot section. It won’t fool a contractor up close, but from six feet away it adds architectural weight rooms that were built without it. Best in bedrooms and small living rooms.
12. Swap plastic outlet covers for stainless or matte black ones
An unnoticed upgrade with outsized effect. Plastic almond outlet covers date a room instantly. A pack of ten metal covers runs $8 to $15. Combined with matte-black light switches ($3–$5 each), the finish upgrade reads as a renovation.
13. Build a headboard from a painted wood panel
A 4×3 foot piece of plywood, sanded, painted or stained, and hung directly on the wall behind a bed creates a headboard shape without furniture. Add wall sconces on either side (battery-powered ones work if you can’t wire) and the whole wall reads as designed. Total: $35–$55.
14. Install peel-and-stick vinyl tile on a small floor
A tiny powder room, a laundry closet, or a small kitchen backsplash accepts peel-and-stick tile beautifully. Prep matters: floors must be clean, dry, and smooth. Expect $2 to $5 per square foot. A 20-square-foot bathroom floor comes in around $40 to $100.
15. Add a large plant (real or high-quality faux)
One large plant does more visual work than five small ones. A fiddle-leaf fig, snake plant, or bird of paradise in a plain terracotta pot fills a corner and softens hard angles. Real plants under $40 exist at most nurseries; high-quality faux fiddle leaves start around $30.
16. Reupholster a chair seat in one afternoon
Dining chairs with drop-in seats reupholster in fifteen minutes each. Unscrew the seat, staple new fabric over the old (no need to remove it), screw the seat back in. A yard of upholstery-weight fabric covers two to four seats and runs $15 to $25.
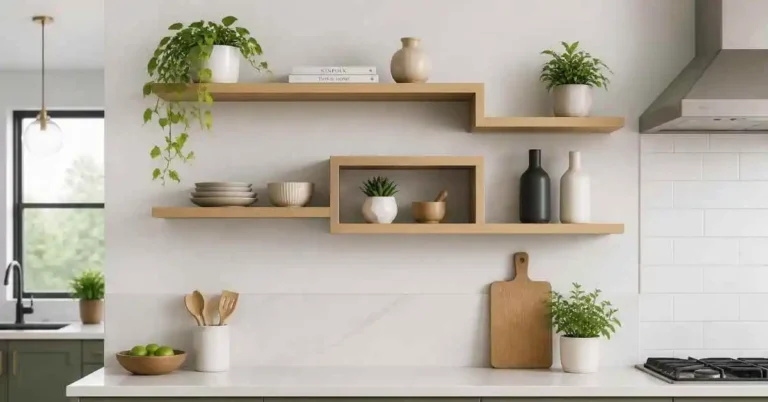
17. Install open shelving using two brackets and a plank
Two black iron brackets ($5 each) and a piece of pine or reclaimed wood ($10–$20) become open shelving in a kitchen, bathroom, or entryway. Sand and oil the wood with any food-safe finish. Style with three items maximum: one tall, one round, one horizontal.
18. Add a runner rug to a plain hallway
Hallways are the most neglected spaces in most homes. A runner rug (2×6 or 2×8 feet) instantly makes the space feel considered. Look for washable, low-pile runners in neutral patterns for around $30–$60.
19. Group candles or hurricane lamps on a tray
A single tray on a coffee table, dining table, or bathroom counter with three pillar candles at different heights costs under $25 and reads as styling. Unscented candles avoid conflicting with cooking or coffee. Use real wax, not battery LED (the flicker looks plastic on camera and in person).
Budget breakdown by project scope
You don’t need $500 to see change. Here’s what different budgets actually get you when spent well.
| Total budget | What it covers realistically |
|---|---|
| Under $25 | New bulbs, one plant, outlet covers, one thrifted lamp |
| $25 to $50 | Above, plus one gallon of paint OR one wallpaper roll OR one rug |
| $50 to $100 | Full room refresh: paint accent wall, two lamps, one rug, hardware swap |
| $100 to $200 | Two full rooms, or one room with new curtains, rug, art, and paint |
| $200 to $500 | Whole apartment refresh with statement pieces (headboard, tiled backsplash) |
Pro tip: Spend your first $30 on lighting before anything else. New warm bulbs and one lamp shift how everything else in the room reads. Buying art and pillows before fixing lighting is like buying a filter for a photo that was underexposed.
The 3-Layer Budget Rule
Every room I’ve styled on a budget follows the same three-layer sequence, and it’s the framework I wish someone had given me when I started. Get each layer right before moving to the next.
Layer 1 — Light and surface ($15 to $75)
This is your foundation. Warm bulbs everywhere, one accent wall or one large piece of removable wallpaper, and metal (not plastic) outlet covers. Nothing else you do matters until this layer is right. A perfectly styled shelf under a cold blue overhead light still looks bad.
Layer 2 — Textiles and softness ($40 to $120)
Once the light and walls are right, add textiles. One rug (or two layered), one curtain upgrade with the rod extended wide and hung high, two to three cushions in mixed textures (linen, boucle, wool), and one throw blanket. This layer is where the room stops looking empty and starts looking lived in.
Layer 3 — Character and story ($30 to $80)
Only now do you add art, plants, ceramics, books, and personal objects. This is the layer most people start with, which is why so many budget makeovers feel cluttered but still empty. Character objects work when they sit on top of the first two layers, not instead of them.
Case study: a $180 rental bedroom over one weekend
I restyled a 12×14 rental bedroom on a $180 budget over one weekend using this exact sequence. Layer 1: a $12 four-pack of 2700K bulbs and a $28 peel-and-stick wallpaper roll behind the bed. Layer 2: a $45 washable rug from a discount site, curtains from the same site for $32, and two thrifted linen pillow covers for $8. Layer 3: three framed public-domain prints ($22 total including printing and thrifted frames), one large snake plant in a terracotta pot ($30), and a single ceramic lamp from a resale shop ($18).
Total: $195, slightly over target. The friend who lived there thought I’d spent triple. The single change that mattered most wasn’t the wallpaper. It was replacing the harsh ceiling bulb.
Reader objections, answered honestly
Won’t dark paint make a small room feel smaller? Usually the opposite, and here’s when it backfires. Small rooms painted in a deep, warm color (charcoal, forest, terracotta) with matching trim actually feel larger because the walls recede visually. The trick is going all in: same color on walls and trim, matte finish, warm bulbs. Where it fails is when you paint one accent wall dark and leave the other three stark white. That contrast highlights the room’s small dimensions instead of hiding them.
Isn’t peel-and-stick wallpaper going to damage my walls? It depends on the wall’s finish, not the wallpaper itself. On properly primed, painted drywall that’s cured for six months or more, quality peel-and-stick removes cleanly. On flat (non-eggshell) paint that’s less than three months old, it can lift paint. Test a small square in an inconspicuous spot for 48 hours before committing to a full wall. Landlords rarely notice; but if this is a concern, stick to the back of bookshelves and inside closets.
Common mistakes that keep budget rooms looking cheap
Every one of these is fixable in an afternoon, and every one is what separates a good budget room from a great one.
Mistake 1: Buying too many small things
Ten $5 objects always look cheaper than one $50 object. Small trinkets crowd surfaces and dilute the eye. The fix: Return half of what’s on your shelves. Empty surface is a design choice. If you must fill it, add one larger item (a big vase, a stack of hardcover books, a single ceramic bowl) instead of five small ones.
Mistake 2: Matching everything
Matching a bedspread to curtains to throw pillows to a rug reads as a hotel-catalogue kit, not a home. The fix: Pick two neutral base tones (cream and warm gray, or oat and charcoal) and let everything else be textural variation on those tones. One accent color, used no more than three times in a room.
Mistake 3: Ignoring the ceiling and trim
White ceilings and bright white trim are the default, not a decision. In rooms with dark walls, they create harsh visual borders. The fix: Paint trim in the same color as walls (drop the sheen to satin or semi-gloss) for a modern seamless look, or paint the ceiling a shade lighter than walls for warmth.
Mistake 4: The wrong-sized rug
The single most common budget mistake. A rug that only sits under the coffee table (with all furniture floating around it) shrinks the room. The fix: The front legs of every seat should touch the rug. If your rug can’t do that, it’s too small. Go up one size, even if it means buying a cheaper material.
Mistake 5: Cold overhead lighting
This is the mistake I see in almost every budget makeover, and it’s why so many DIY rooms photograph badly. Ceiling fixtures with 4000K or 5000K bulbs make wood look gray, skin look sick, and every soft textile look flat. The fix: Every bulb in the home to 2700K, and where possible, turn off the overhead entirely and use lamps only.
FAQs
How much does it cost to decorate a small living room on a budget? A small living room refresh runs $80 to $200 if you’re smart about it. Expect roughly $30 on lighting (warm bulbs plus one thrifted lamp), $40 on paint for an accent wall, $50 on a decent rug from a discount site, and $30 on textiles and thrifted accessories. Anything left over goes to plants and art.
What’s the easiest DIY decor project for beginners? Swapping bulbs. It takes fifteen minutes, costs under $15, needs zero skill, and changes how every other thing in the room looks. After that, hanging a curtain rod higher and wider than the window is the second-easiest project with an outsized payoff.
Can renters do these projects without losing their deposit? Yes. Peel-and-stick wallpaper, removable hooks, tension rods, unattached headboards, and clip-on shelf lights all leave zero trace. Test any adhesive product on a small hidden spot before committing to a full wall, and take dated photos before you start so you can prove the original condition later.
Where’s the best place to shop for cheap decor that doesn’t look cheap? Local thrift stores, estate sales, and secondhand marketplaces beat any big-box discount store for character. Real materials at low prices always outperform new synthetic materials at similar prices. For new items, discount home stores (the ones that rotate stock weekly) work best for basics like bulbs, hardware, and simple frames.
How do I know when to DIY versus buy something new? DIY when the piece has good bones and just needs paint, hardware, or reupholstery. Solid wood, a shape you like, and structural integrity mean it’s worth the weekend. Buy new when the base material is particle board, veneer chipping is visible, or you’d need to replace more than 30 percent of the piece to make it work.
Do I need to prime walls before painting an accent wall? For most white or light walls that are clean and in good condition, a quality paint-and-primer product skips the separate primer step. Prime only if you’re painting over dark colors, stained areas, glossy finishes, or new drywall. One coat of primer plus two thin coats of color will always look better than three coats of paint alone.
Bringing it all together
Budget decor works when you stop trying to imitate expensive decor and start using the tools it uses: warm light, real materials, restraint. The 3-Layer Budget Rule keeps every dollar working, and the mistakes above cover the traps that catch most people on their first attempt.
Pick one room. Start with the bulbs. Then paint or paper one wall. Add one rug. Everything else is a bonus, not a requirement. Come back to HomeDecorIdeas when you’re ready for the next room, and we’ll walk through the next layer together.