Kitchen counters collect chaos. A stray oil bottle here, a random coffee mug there, three spice jars that never made it back to the cupboard. Even in tidy kitchens, the counter always ends up looking accidental instead of styled.
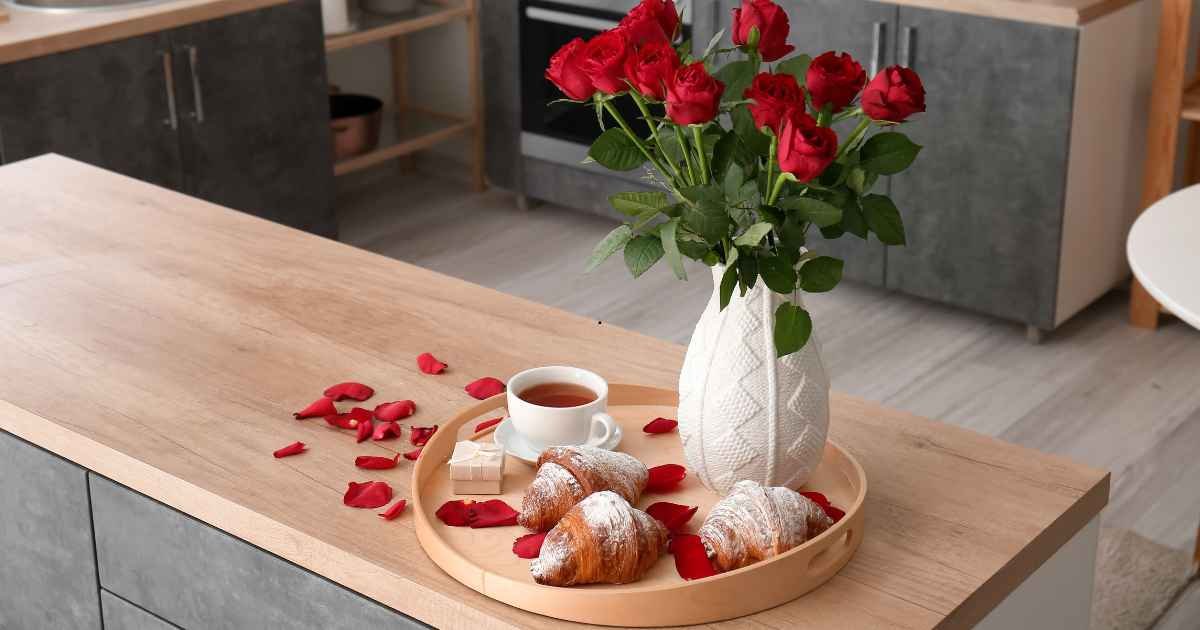
A decorative tray for kitchen counter use is the single easiest fix. One well-chosen tray corrals scattered items into a vignette that reads as intentional, adds material warmth (wood, marble, brass) that most kitchens lack, and gives the eye a place to land. The right tray shifts a countertop from cluttered to considered without moving a single wall or spending more than $50.
This guide covers 11 practical tray ideas across coffee stations, cooking corners, herb displays, and bar setups, plus the framework for making any tray look styled rather than shopped. The mistake in the final section is the one that turns tray styling into just more clutter.
Key takeaways:
- The right decorative tray corrals scattered items into one styled vignette instantly
- Wood, marble, and brass trays read premium; plastic and mirrored trays date quickly
- Tray size matters — too small looks lost, too large dominates the counter
- Every styled tray follows the 3-item rule: one functional, one styling, one botanical
- Trays under $30 are common; anything over $80 needs to be real wood, real marble, or real brass
- Keep trays 4–8 inches from the sink to avoid constant splash damage
Why decorative trays work on kitchen counters
A decorative tray for kitchen counter use serves two purposes at once. First, it defines a visual “zone” so that the coffee station, spice trio, or fruit bowl reads as one intentional grouping instead of scattered objects. Second, it introduces a natural material (wood, marble, ceramic) into a room dominated by fixed surfaces like stone counters and painted cabinets.
The corralling effect
Loose objects on a counter always read as clutter, even when they’re used daily. Group the same three or four items on a tray and the eye reads them as one composed feature. This is the same principle designers use in shelf styling and living room console vignettes.
Material warmth in a hard-surface room
Kitchens are dominated by cold surfaces — quartz, ceramic, tile, chrome, stainless steel. A tray in warm wood or aged brass introduces a natural texture that the room otherwise lacks. Even one small wooden tray does more warming work than any decorative object placed loose on the counter.
11 decorative tray ideas for kitchen counter styling
The 11 ideas below cover different counter zones and use cases. Each includes the tray size, material suggestion, and what to put on it. Pick two or three that suit your kitchen’s actual habits — filling the counter with too many trays defeats the whole styling purpose.
1. Coffee station tray
The most popular use. Group your coffee maker or French press, one matching mug, a small canister of beans or sugar, and a tiny spoon rest on a 14–18 inch wooden or marble tray. Reads as a mini café corner and keeps the morning setup visually contained. Best materials: walnut, acacia, or white marble.
Where it fails: if you use three different coffee methods (machine + French press + pour-over) and try to fit them all on one tray. Pick one method per station.
2. Cooking oil and seasoning trio
Olive oil, salt cellar, and pepper mill in matching or complementary vessels on a small 10–12 inch wooden tray by the stove. Keeps the essentials in reach during cooking and looks styled between meals. Best materials: olive wood, walnut, or matte black metal.
Where it fails: stainless or shiny metal trays near a stove show fingerprints and oil splatter within days. Matte finishes only.
3. Fruit bowl tray
Instead of a single fruit bowl, use a shallow 14–18 inch tray with two or three ceramic bowls or one large woven basket for fruit. Mixing tray plus vessels reads more curated than a lone fruit bowl on bare counter. Best materials: rattan, seagrass, or light oak.
Where it fails: if the fruit turns over faster than you notice. Old fruit smell in a woven tray is hard to remove. Wipe-clean surfaces beat woven for actual fruit storage.
4. Herb pot trio tray
Three small terracotta pots with basil, mint, and rosemary lined up on a rectangular 12–16 inch tray suits any kitchen with a windowsill or bright counter corner. Doubles as decor and functional herb garden. Best materials: aged terracotta, unglazed ceramic, or matte black metal.
Where it fails: in kitchens with low natural light. Live herbs die within weeks. Use faux herbs on the same tray for the same look.
5. Cutting board vignette
Lean a large wooden cutting board against the backsplash and set a small round tray in front holding a butter dish, salt cellar, and small vase of flowers. Reads as a permanent styled feature even when nothing’s being cooked. Best materials: walnut cutting board with marble or brass round tray.
Where it fails: if the cutting board is your primary daily prep board. Style with a separate display board.
6. Bar cart corner tray
Dedicate one counter corner to a bar setup — 14–18 inch tray holding two decanters (whiskey, gin), a matching pair of glasses, and a small bowl of citrus or bar tools. Even non-drinkers benefit from this vignette; swap the alcohol for infused water pitchers. Best materials: mirrored, brass, or dark wood.
Where it fails: in small kitchens where the tray takes up counter you need for prep. Move to a sideboard or nearby shelf instead.
7. Baking essentials tray
A larger 16–20 inch tray holding a flour canister, sugar jar, small ceramic bowl for baking soda, and a wooden rolling pin. Keeps bake day tools together and looks intentional between uses. Best materials: cream ceramic tray or light oak.
Where it fails: if you bake rarely. Baking supplies out year-round attract dust and pantry moths. Only use this vignette if it earns its counter real estate.
8. Sink-side tray
A small waterproof tray (10–12 inch) next to the sink holding hand soap, dish soap, a small ceramic dish for rings, and hand cream. Corrals the daily sink chaos without hiding it. Best materials: marble, ceramic, or teak (naturally water-resistant).
Where it fails: any wood except teak or bamboo warps from constant water exposure within a year. Marble and ceramic hold up indefinitely.
9. Tea station tray
Similar to the coffee station but tea-focused. Small kettle or thermal carafe, matching mugs or cups, a small canister for loose leaf, and a tiny honey or sugar jar on a 12–16 inch tray. Suits tea drinkers and pairs beautifully with a small windowsill herb garden.
Where it fails: if your kettle is oversized. Match tray to kettle proportion, not the other way around.
10. Small appliance corral
Larger 20–24 inch tray holding grouped small appliances — toaster, kettle, coffee grinder. Corralling them together with a slight color match makes them read as intentional. Best materials: solid wood only (light appliances need stability); matte black metal for industrial kitchens.
Where it fails: if the tray isn’t rated for the appliance weight. Cheap thin trays warp under a toaster within months.
11. Sunday brunch permanent vignette
An always-there styling tray — no functional items, purely decor. Small round or square 10–14 inch tray with a candle, a small stack of two cookbooks, a tiny plant, and one wooden spoon or utensil. Reads as an editorial magazine kitchen shoot. Best materials: brass, marble, or dark wood.
Where it fails: in high-cooking kitchens where the vignette becomes overflow storage within a week. Only add this if you can commit to keeping it purely decorative.
How to choose the right decorative tray
The right decorative tray for kitchen counter styling depends on three factors: your counter’s available space, the tray’s intended function (styling only vs functional corral), and the material match with your existing kitchen finishes. Skip any one and even a beautiful tray looks off in the space.
Tray size by counter area
| Counter space available | Best tray size | What fits on it |
|---|---|---|
| Under 24 inches wide | Small round 8–12 inches | Oil + salt cellar + one small item |
| 24–36 inches wide | Medium 12–16 inches | Coffee station or herb trio |
| 36–48 inches wide | Large 16–20 inches | Baking corner or bar setup |
| Over 48 inches wide | Multiple layered trays | Full kitchen station zones |
Pro tip: never let a tray take up more than one-third of the counter length in front of it. A 20-inch tray on a 30-inch counter dominates. On a 60-inch counter it reads as intentional focal.
Material by kitchen style
| Kitchen style | Best tray materials | Skip these |
|---|---|---|
| Modern minimalist | Marble, matte black metal, light oak | Ornate metal, rattan |
| Farmhouse | Aged wood, distressed metal, cream ceramic | Modern acrylic, chrome |
| Scandi / Japandi | Light oak, ash, unglazed ceramic | High-gloss finishes, brass |
| Traditional | Silver-plate, mahogany, brass | Matte black, industrial metal |
| Coastal | Rattan, driftwood, sea grass | Dark walnut, cool chrome |
| Industrial | Matte black metal, reclaimed wood, concrete | Cream ceramic, ornate patterns |
The metal-finish match
Your tray should either match or intentionally contrast one dominant metal in the kitchen. Match a brass tray to brass hardware for a coordinated look. Contrast a matte black tray in a chrome kitchen for a designed accent. Mixing three metals on the same counter (chrome faucet + brass tray + matte black knobs) reads as accidental unless done with real design skill.
The 3-item tray vignette rule
Every well-styled decorative tray follows a simple rule: three items at three different heights covering three different purposes. One functional item (the thing that gets used daily), one styling item (a candle, cookbook, or decorative object), and one botanical item (fresh herbs, plant, dried flowers). Skip any category and the tray reads as either purely functional or purely decorative — never balanced.
The three items broken down
- Item 1 — Functional: the object that earns the tray’s place. Coffee maker, oil bottle, kettle, fruit bowl. This is why the tray exists.
- Item 2 — Styling: a decorative object that adds visual interest without needing a job. Candle, small stack of cookbooks, wooden bowl, ceramic sculpture.
- Item 3 — Botanical: something organic and alive (or convincingly faux). Small potted herb, a tiny vase with one flower, dried lavender, or a small trailing plant.
Different heights matter as much as different purposes. Tall item at back, medium in middle, small at front. All three at the same height reads as a line, not a composition.
One kitchen — full tray vignette in numbers
I helped a friend style her kitchen counter over one Saturday morning on a $52 budget for a 14-square-foot L-shaped counter. The starting point: cluttered coffee corner with 8+ loose items including three mugs, sugar packets, and a random succulent.
Purchase 1 ($22): 14-inch acacia wood round tray from a home store.
Purchase 2 ($18): matching pair of cream ceramic mugs (one for daily use, one displayed).
Purchase 3 ($12): small terracotta pot with fresh mint from the garden center.
Free additions: her existing French press (functional item), one existing sugar canister moved from cupboard, one cookbook already owned.
The 3-item rule applied: functional (French press + sugar canister as one grouping), styling (cookbook + displayed mug), botanical (mint pot). Total items on the tray: five, but grouped as three visual zones. Result: what was a cluttered corner became a small café vignette in under 2 hours. The rest of the counter stayed clear.
Common mistakes when using decorative trays
Most tray styling fails from one of five patterns: choosing the wrong size, overloading with items, mixing incompatible materials, using the tray as overflow storage, or picking trays that don’t survive kitchen conditions. All are easy to fix once you spot them.
1. Choosing a tray too small for the counter
A 6-inch tray on a large kitchen counter looks lost. A tray that’s dwarfed by its surroundings reads as afterthought. Match the tray to at least 25–35% of the counter width in front of it.
2. Overloading with more than 3–5 items
Piling seven or eight items onto a tray defeats the purpose. Trays work because they contain a small styled grouping. More than five items and you’re back to counter clutter, just contained in a rectangle.
3. Mixing incompatible materials on one tray
Plastic canisters on a marble tray. A silver-plate tray under wooden bowls. Materials on the tray should complement each other tonally. All warm (wood + brass + terracotta) or all cool (marble + white ceramic + brushed nickel), rarely both.
4. Using the tray as overflow storage
The moment a tray becomes the place mail lands, keys go, and unfinished projects sit, it stops being decor and becomes junk drawer. Commit to keeping the tray purely for its intended vignette. That’s how cheap decor still reads expensive — restraint about what goes on it matters more than the tray itself.
5. Choosing trays that don’t survive kitchen life
Untreated wood near sinks warps. Mirrored trays show water spots. Cheap lacquered wood chips within months. Buy trays rated for kitchen use or made from teak, marble, ceramic, or sealed hardwood.
Reader objection: isn’t a tray just adding more clutter?
Only if you add a tray without removing anything else. A well-used tray replaces clutter — you take five loose items scattered across the counter and consolidate them onto one styled surface. If your counter had eight items before and now has one tray with eight items on it, that’s not styling, that’s rearranging. Real tray styling reduces total visible object count by 30–50%.
Reader objection: how do I keep a tray clean in a real cooking kitchen?
Place the tray at least 4–8 inches from the sink and 12+ inches from the stove. Wipe it once during your weekly kitchen clean. For sink-side trays, use materials that don’t warp (teak, ceramic, marble, stainless). For stove-side trays, matte finishes that hide oil splatter. Trays styled properly for their zone don’t add significant cleaning time.
FAQs
What size decorative tray works best on a kitchen counter? For most kitchens, a medium 12–16 inch tray suits coffee stations, herb trios, and cooking essentials. Small 8–12 inch trays work for accent vignettes and sink-side use. Large 18–24 inch trays suit bar corners or small appliance groupings. Never let a tray dominate more than one-third of the counter length in front of it.
What material is best for a kitchen counter tray? For kitchen use, wood (walnut, acacia, teak), marble, and ceramic all age well and clean easily. Teak resists water damage best for sink-side placement. Marble handles oil and heat exposure. Matte metal (brass, matte black) suits stove-side use. Avoid cheap lacquered wood, mirrored surfaces, and any untreated softwood.
How do I style a decorative tray on my kitchen counter? Follow the 3-item rule: one functional item (the reason the tray exists), one styling item (candle, cookbook, decor object), and one botanical (fresh herb, small plant, or dried flowers). Vary heights so items don’t line up flat. Group in odd numbers and keep total object count on the tray to 3–5 items.
Should I use one tray or multiple trays on the counter? For most kitchens, one or two trays maximum. A single medium tray creates a focal vignette. Two smaller trays work if the counter is long enough to give each its own zone (36+ inches apart). Three or more trays on the same counter competes for attention and returns the room to visual clutter.
Do decorative trays work in small kitchens? Yes, and small kitchens actually benefit most. A tray in a small kitchen makes existing counter items look intentional rather than crammed. Use one small 10–12 inch tray only, place it in the least-used counter zone, and follow the 3-item rule strictly. For more space-saving decor ideas, see the small kitchen decorating guide.
How much should I spend on a decorative kitchen tray? Budget-friendly trays run $15–$35 in acacia wood, ceramic, or basic metal. Mid-range trays at $40–$80 typically use walnut, marble, or brass. Premium trays above $80 should be real materials (solid marble slab, sealed hardwood, aged brass). Avoid anything above $30 in lacquered particle-board or thin metal.
Bringing it all together
A decorative tray for kitchen counter styling works when it corrals scattered items into a considered vignette, adds material warmth to a room full of hard surfaces, and follows the 3-item rule for a balanced look. Skip the wrong size, wrong material, or wrong item count, and even an expensive tray reads as another piece of clutter.
Pick one counter zone that bothers you (the coffee corner, the oil-and-salt grouping, the sink area), buy one tray sized for that space, style it with three items, and see how the whole kitchen shifts. Trays are the easiest single-purchase upgrade in kitchen styling. The rest of the kitchen decor guides walk through the surrounding decisions once the counter vignette is set.
Explore perspectives that broaden your mind—our diverse viewpoints enrich your understanding.