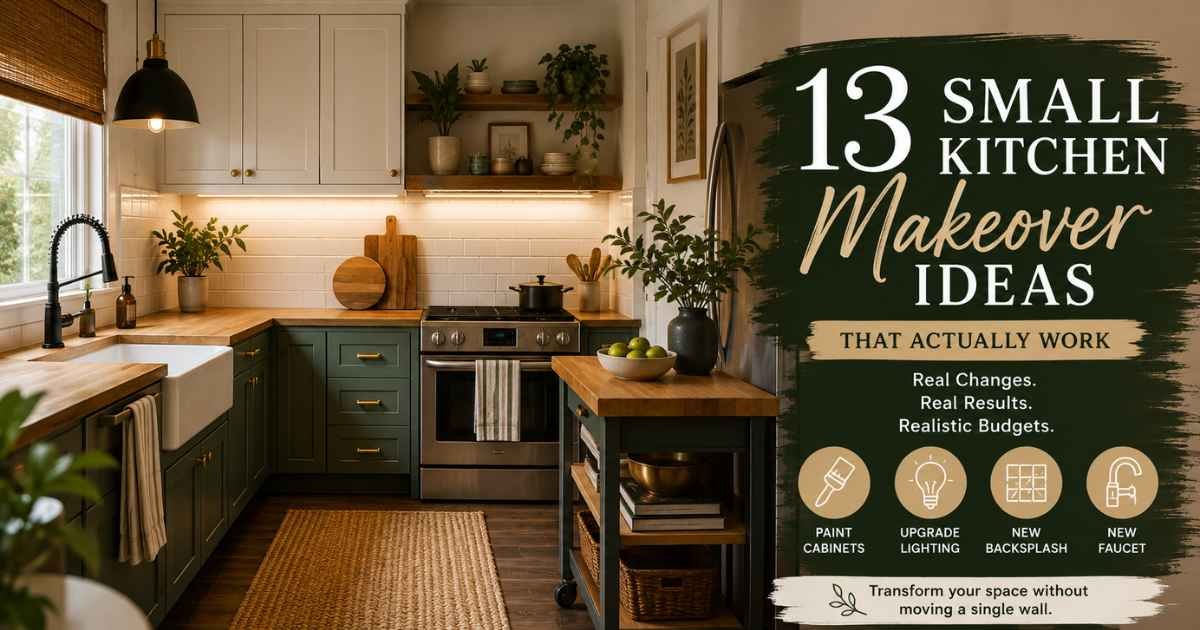
Small kitchen makeover advice usually falls into two camps: expensive full remodels needing a contractor and $30,000, or fluffy “add a plant” lists that don’t change how your kitchen feels. Neither helps if you have a real kitchen and a weekend to work with.
Small kitchen makeover ideas that actually work land in the middle, bigger than a decor refresh, smaller than a demolition. Repainted cabinets, reworked lighting, one new surface, and a committed style direction can shift a small kitchen from dated to intentional without moving a single wall.
This guide covers 13 makeover ideas ordered by commitment level, plus the framework that ties them together so nothing looks random. Every idea includes real materials, a time estimate, and where the trick fails. The mistake in the final section is the one that kills most DIY makeovers before they finish.
Key takeaways:
- Small kitchen makeovers succeed when they change one big thing plus three medium things
- Cabinet color, lighting, and countertops carry the most visual weight in any makeover
- Committing to one style direction beats mixing three “safe” trends
- Full makeovers land between $200 and $3,500 depending on commitment level
- The most-skipped step is planning the order of work; execution order matters more than budget
What counts as a small kitchen makeover
A small kitchen makeover changes the visible character of the kitchen without moving plumbing, gas, or walls. It covers cabinet updates, lighting overhauls, surface refreshes, and style commitment. Anything requiring a contractor for structural, electrical, or plumbing work moves the project from makeover to renovation.
Cosmetic vs. structural changes
Cosmetic changes include painting, refacing, hardware, backsplash, flooring overlays, lighting fixtures, and any decorative styling. Structural changes involve moving sinks, gas lines, load-bearing walls, or the electrical panel. Makeovers stop at cosmetic. Renovations begin at structural.
The three levels of makeover commitment
- Weekend refresh: 8–16 hours, under $200, cosmetic only
- Focused makeover: 2–3 weekends, $200–$1,000, cabinet paint or peel-and-stick, hardware, lighting, styling
- Full cosmetic makeover: 3–6 weekends, $1,000–$3,500, cabinet refacing or repainting, new countertop overlay, new lighting fixtures, flooring overlay, complete styling
If your budget lands under $200 total, small kitchen decorating ideas on a budget handle that scope better. This guide picks up where a refresh ends and covers the bigger makeover moves.
13 small kitchen makeover ideas that actually work
These ideas are ordered by commitment level, starting with weekend fixes and ending with focused makeover moves. Any three together create a visible makeover. Any six together shift how the room feels and functions. Pick based on your available time and budget.
1. Commit to a full cabinet color change
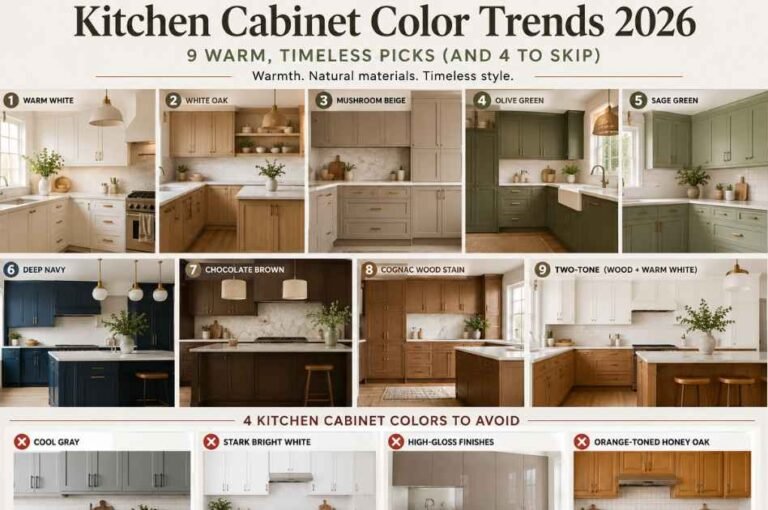
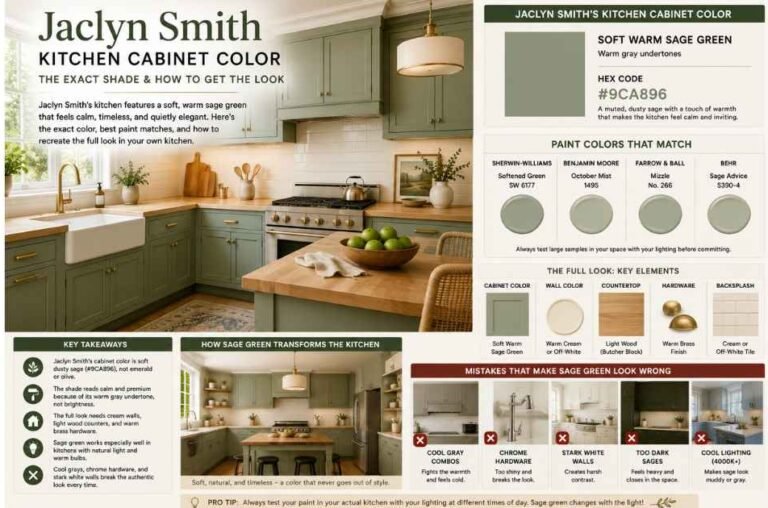
The single biggest makeover move short of new cabinets. Painting all cabinet fronts in one warm, current color modernizes even the most dated kitchen in one long weekend. Warm white, mushroom beige, olive green, or sage on the lowers all work, matching the direction of current kitchen cabinet color trends. Budget $80–$200 for paint, primer, and rollers. Time: 12–20 hours across two to three days for prep, primer, two coats, and cure.
Where it fails: on laminate or thermofoil cabinets without the right primer. Paint peels within a year without proper prep.
2. Reface cabinets instead of replacing
Refacing keeps the cabinet boxes but replaces the doors and drawer fronts with new ones. It costs 40–60% less than full replacement and delivers a completely new kitchen look. DIY refacing kits run $400–$800 for a small kitchen. Professional refacing runs $2,500–$5,000. Time: one weekend DIY, or 2–3 days professional.
Where it fails: if the cabinet boxes themselves are damaged or made of particleboard that’s starting to swell. Then you need full replacement, not refacing.
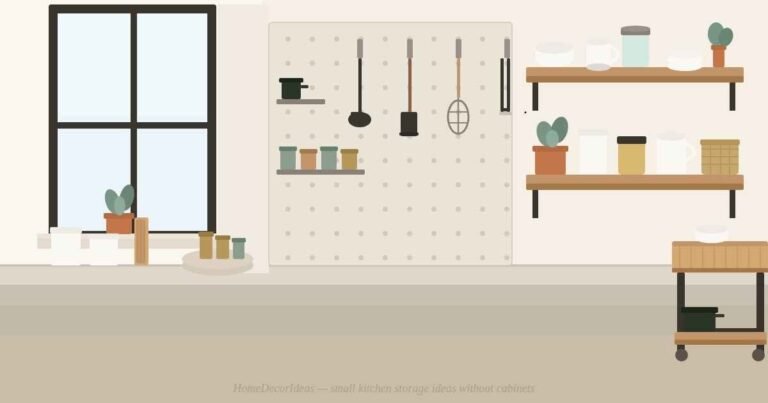
3. Convert one upper cabinet run to open shelving
Removing one section of upper cabinets and replacing with two or three wooden floating shelves opens the kitchen visually and creates a display zone. Best done on the wall opposite the sink, or above a coffee station. Budget $30–$100 for shelves and brackets. Time: 3–5 hours.
Where it fails: on walls without solid studs behind the drywall. Use proper anchors rated for shelf weight (usually 20–30 lbs including contents).
4. Add butcher block or countertop overlay
Replacing existing counters with butcher block runs $200–$600 in materials for a small kitchen, one of the cheapest countertop upgrades that reads premium. Peel-and-stick countertop overlays (marble-look vinyl) cost $30–$80 and last 2–3 years for a lower-commitment fix. Butcher block time: one weekend. Overlay: 3 hours.
Where it fails: butcher block near a sink needs sealing every 3–6 months, otherwise water damage. Overlay near the stove burns.
5. Add a small peninsula or rolling cart
If your small kitchen has any 30×36 inch bare wall or floor space, adding a small peninsula bracketed to one wall, or a rolling butcher block cart, adds prep space, storage, and a visual anchor. Cart cost: $150–$400. Peninsula DIY: $200–$500. Time: 4–8 hours.
Where it fails: in truly galley-shaped kitchens under 5 feet wide, either option blocks the walkway. Skip both.
6. Deep single-basin sink swap
A deep single-basin stainless or fireclay sink instantly modernizes a small kitchen and holds more than a divided double sink of the same size. Undermount installs beat drop-in visually. Cost: $150–$400 for the sink, $50–$200 for professional install. Time: 3–6 hours if plumbing is straightforward.
Where it fails: in laminate countertops where undermount isn’t possible. Drop-in single-basin works but reads less premium.
7. New range hood, statement plus function
Most builder-grade over-range microwaves are ugly and vent poorly. Replacing with a real hood (stainless, matte black, or a custom wood-wrapped surround) improves ventilation and adds a focal point. Hood cost: $200–$800. Custom wood surround: $100–$300 in materials. Time: 4–8 hours (needs electrical).
Where it fails: in rentals or in kitchens where the microwave has no other home. Freestanding countertop microwaves solve that problem.
8. Pendant lighting over the main work zone
One or two pendants over the sink, peninsula, or dining zone instantly modernize a small kitchen. Look for glass, ceramic, or unlacquered brass shades in a scale appropriate to the room (10–12 inches diameter maximum in small kitchens). Cost: $60–$300 per pendant. Time: 2–4 hours per fixture.
Where it fails: hanging over the wrong zone (usually too far from the sink). Center the pendant on the workspace, not the ceiling.
9. LVP or peel-and-stick flooring refresh
Luxury vinyl plank (LVP) click-lock flooring lays directly over existing floors without adhesive, at $2–$5 per square foot in materials. A small kitchen (60–100 sq ft) totals $150–$500. Peel-and-stick tile at $1–$3 per sq ft works for rentals. Time: one weekend for either.
Where it fails: over uneven or damaged subfloor. Level the floor first or click-lock planks separate at the seams within months.
10. Refresh the ceiling — paint plus one detail
The ceiling is the fifth wall and usually the most ignored. A fresh coat of crisp white ceiling paint immediately brightens a small kitchen. Add beadboard planks, one wooden beam, or crown molding for a style commitment. Paint cost: $30–$60. Beadboard or trim: $80–$200. Time: 4–8 hours.
Where it fails: dark or busy ceilings in small kitchens. White or off-white only, nothing else works overhead in a small space.
11. Vertical storage — pot rack, knife strip, herb wall
Small kitchens waste vertical wall space. A wall-mounted pot rack, magnetic knife strip, or vertical herb garden turns empty wall into function while adding visual interest. Cost: $30–$150 each. Time: 1–2 hours per install.
Where it fails: on plaster or brick walls without proper anchors. Test-drill and use masonry anchors before mounting anything heavy.
12. Panel-ready or painted fridge
The fridge is the biggest visual object in most small kitchens, and it usually clashes. Options in order of commitment: clean every magnet and paper off (free), paint the fridge with appliance paint ($30–$80), buy a magnetic front panel (custom, $200–$500), or replace with a panel-ready model that hides behind a cabinet-matched front ($1,500+). Time: 1 hour to full-day project.
Where it fails: with paint jobs that peel from door-slam vibration. Prep and cure time both matter.
13. Commit to one metal family
The single most professional-looking move in any makeover: pick one metal (unlacquered brass, matte black, or brushed nickel) and use it on every fixture, cabinet hardware, faucet, light fixtures, towel bar, appliance handles. Small kitchens especially amplify metal mixing chaos. Cost: varies by scope of updates. Time: incorporated into other work.
Where it fails: in kitchens with fixed metal elements you can’t change. Match to whichever metal appears in the most locked-in element.
How to plan the makeover — time, order, and budget
A successful small kitchen makeover follows a set order: paint or refinish first (highest disruption), then hardware and fixtures, then surfaces and lighting, then styling last. Working out of order means repainting after installing hardware, or covering fresh paint with dust. Order saves more money and time than budget size.
Makeover level table
| Makeover level | Time | Cost range | What’s included | Visual impact |
|---|---|---|---|---|
| Weekend refresh | 8–16 hrs | Under $200 | Bulbs, hardware, declutter, styling | Room feels lighter and cleaner |
| Focused makeover | 2–3 weekends | $200–$1,000 | Cabinet paint, backsplash, lighting, new faucet, styling | Kitchen reads intentional and modern |
| Full cosmetic | 3–6 weekends | $1,000–$3,500 | Cabinet refacing, countertop, flooring, full lighting, styled surfaces | Kitchen feels new without a contractor |
| Structural | Contractor needed | $5,000+ | Wall changes, moving appliances, new cabinets | Different project entirely |
Pro tip: Book the paint step for the first weekend of the makeover. Paint needs 24–72 hours to fully cure, and everything else (hardware, lighting, faucet install) happens after. Getting the messy step done first also unblocks momentum.
The order of operations
- Clear the kitchen entirely (empty cabinets, pull small appliances off counters)
- Paint cabinets and walls (the disruptive step)
- Install cabinet hardware, faucet, and any new light fixtures
- Apply peel-and-stick backsplash or install butcher block
- Install flooring or ceiling detail if included
- Restock cabinets thoughtfully (leave 30% empty for future items)
- Style the display zones last
The makeover looks best when it commits to a clear design style direction rather than mixing three “safe” trends into one room.
The 4-layer small kitchen makeover method
Every successful small kitchen makeover works in four layers that must be tackled in order: Foundation (walls, floors, cabinets), Function (lighting, storage, workflow), Finish (hardware, fixtures, surfaces), and Feature (styling, accents, personality). Skip a layer or reverse the order, and the result reads incomplete.
The four layers explained
- Layer 1 — Foundation: cabinet color, wall color, and any flooring or ceiling change. This is the biggest, messiest layer and must happen first.
- Layer 2 — Function: three-height lighting, storage additions (open shelving, pot rack, peninsula), and any workflow improvements. This layer determines whether the kitchen actually works better after the makeover.
- Layer 3 — Finish: cabinet hardware, faucet, one metal family, backsplash, countertop refresh. This is where “makeover” becomes visible.
- Layer 4 — Feature: one styled coffee station, framed art above a shelf, plants, matching pots, cutting board leaning against the backsplash. This is the personality layer.
Every kitchen needs all four. A gorgeous foundation with no styling reads as unfinished. Styling on top of a broken foundation reads as trying-too-hard. All four layers, in order, gives a small kitchen that reads intentional from every angle.
One real kitchen — full makeover in numbers
I helped a friend fully make over a 90-square-foot L-shaped rental kitchen on an $840 budget across three weekends (28 hours total work). The starting point: builder-grade white cabinets, cool overhead fluorescent, tan laminate counters, dated brass-tone hardware, and a beige tile floor.
Layer 1 (Foundation), weekend 1, $220: Painted all lower cabinets sage green, kept uppers warm white. Painted the ceiling a bright white to lift it visually. Bulb swap to warm 2700K throughout.
Layer 2 (Function), weekend 2, $340: Removed one upper cabinet run and installed three wooden floating shelves. Added a magnetic knife strip and a small hanging pot rack. Installed an under-cabinet LED strip.
Layer 3 (Finish), weekend 3 (Saturday), $220: Replaced all cabinet hardware with unlacquered brass pulls. Swapped the faucet for a matte brass single-lever. Applied peel-and-stick zellige-look backsplash on the sink wall only.
Layer 4 (Feature), weekend 3 (Sunday), $60: Styled the open shelves with mugs, small plants, and a cookbook. Added one thrifted framed botanical print above the coffee station. Placed a wooden cutting board leaning against the backsplash.
Total: $840, three weekends, one kitchen that read like a mid-range remodel photographed in a magazine. The four layers did the work. Skipping any layer would have compromised the result.
Common small kitchen makeover mistakes
Most small kitchen makeovers fail from one of five mistakes: skipping the planning step, mixing too many styles, buying products before measuring, chasing trends into permanent surfaces, and treating the makeover as one massive weekend instead of layered work. Fix these and any budget makeover succeeds.
1. Starting without a plan
Buying paint on a whim and starting Friday night with no plan produces a half-finished makeover by Sunday. Every idea in this guide requires 30 minutes of planning first: what stays, what changes, what order, what tools. Skip planning and you burn a weekend for no visible result.
2. Committing to two competing styles
Farmhouse cabinets plus mid-century pendants plus a coastal rug plus boho open shelving does not read as eclectic. It reads as confused. Pick one style direction and stay disciplined. The best small kitchen makeovers commit clearly to one direction.
3. Buying products before measuring
Cabinet hardware in the wrong screw spacing. Pendants sized for a room twice as big. Runner rugs that don’t fit the walk zone. Measure before every purchase, and confirm the measurement twice for anything over $50.
4. Chasing trends into permanent surfaces
Trendy backsplash tiles, cabinet colors of the moment, dated pendant shapes. These belong in accessories you can swap, not surfaces you’ll live with for a decade. Pick timeless bones (warm white, natural wood, matte finishes) and let accessories carry the trend load. That’s how cheap decor still reads expensive years after purchase.
5. Attempting the whole makeover in one weekend
Small kitchen makeovers work in layers over multiple weekends, not in one massive push. One-weekend attempts skip prep, cut cure times, and produce visibly rushed work. Plan two to three weekends minimum for any focused makeover.
Reader objection: can I really make over my kitchen without renovating?
Yes, and often the makeover looks better than a lazy renovation. Renovations move plumbing and walls. Makeovers change everything you see: cabinet color, hardware, lighting, surfaces, and styling. A well-planned $1,000 makeover often reads as more intentional than a $15,000 renovation that changed nothing about the character of the room.
Reader objection: will DIY makeover work look amateur?
Only when the prep and finish are wrong. Amateur makeovers show in three places: paint drips and roller marks, unlevel shelves, and mismatched metals. Fix those three issues (proper prep, level tool, one metal family) and DIY makeovers photograph as well as professional ones.
FAQs
How long does a small kitchen makeover take?
A focused small kitchen makeover takes two to three weekends for one person, or one weekend for two people working together. Weekend one covers paint and disruption. Weekend two covers hardware, fixtures, and any surface work. Weekend three is styling and finishing touches. Full cosmetic makeovers span four to six weekends.
How much does a small kitchen makeover cost?
Most small kitchen makeovers land between $200 and $3,500 depending on commitment level. Under $200 covers a weekend refresh. $200–$1,000 covers a focused makeover with new paint, hardware, backsplash, and lighting. $1,000–$3,500 covers a full cosmetic makeover including countertop overlays, flooring, and full lighting overhaul.
What is the highest-impact small kitchen makeover idea?
Painting the cabinets in a current, warm color. Nothing else changes the visual character of a small kitchen more per dollar spent. A full cabinet repaint runs $80–$200 in materials and completes in one weekend of prep, primer, and two coats. Every other makeover idea builds on that foundation.
Can I do a small kitchen makeover in a rental?
Yes. Rental-safe makeovers skip cabinet painting and structural changes, and focus on removable upgrades: peel-and-stick backsplash, adhesive under-cabinet lights, swap-back hardware (with original screws saved), leaning cutting boards, plants, runner rugs, and framed art. Save the paint for after negotiating with the landlord or buying the property.
What order should I do a small kitchen makeover in?
Paint first (the disruptive step), then hardware and fixtures, then surfaces (backsplash, countertops), then flooring or ceiling if included, then styling last. Skipping this order means repainting over fresh hardware or covering finished surfaces with dust. Order matters more than budget size for a clean final result.
Do small kitchen makeovers add resale value?
Yes, especially cabinet paint, hardware, and lighting upgrades. Buyers form kitchen impressions within seconds of walking in, and these three elements shape that first impression more than any other. A $500 focused makeover often returns $2,000+ in perceived value at listing time, even without touching the structural bones of the kitchen.
Bringing it all together
Small kitchen makeovers succeed when they follow layers: foundation first, function second, finish third, feature last. Pick three to six ideas from the list, plan two to three weekends, and work in order. The result will read as intentional in a way that quick refreshes and haphazard remodels rarely do.
Start with one big idea (cabinet color or a full lighting swap) and build outward. Weekends done in order beat one rushed marathon every time.
Unlock the door to endless possibilities—explore our versatile resources that adapt to your needs.