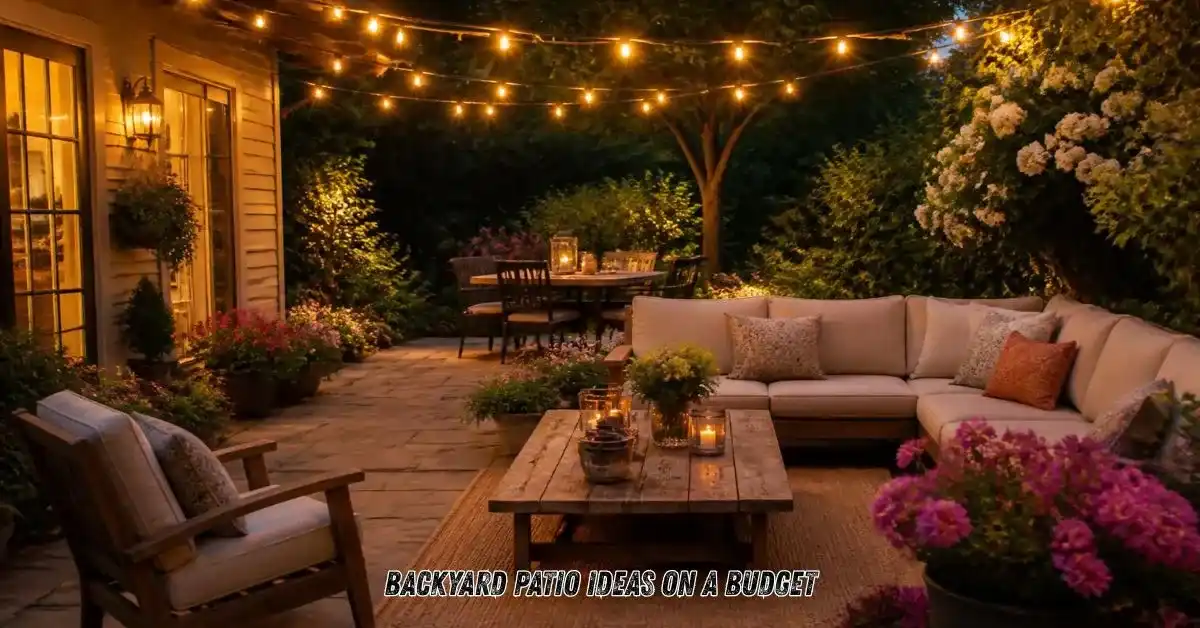
Backyard patio ideas on a budget work best when the ground preparation comes first and the furniture comes last. A gravel or paver patio built on a properly compacted base costs a fraction of poured concrete, and it holds up just as well for most backyards.
Most budget patio projects go over cost because people buy furniture and decor before they’ve settled on the patio’s size and material. That order gets expensive fast, since a beautiful outdoor sofa doesn’t fit the footprint you end up with once the ground work is actually done.
The mistake near the end of this guide costs more money to fix later than almost anything else on this list, and it happens before a single paver goes down.
Key takeaways:
- A compacted gravel base underneath pavers or loose gravel prevents shifting and sinking, and skipping it is the top reason budget patios fail early.
- Loose gravel patios cost less per square foot than pavers or poured concrete and require no cutting or fitting.
- DIY paver patios typically run 8 to 15 dollars per square foot in materials, well under professional installation costs.
- A slight slope, about a quarter inch per foot, away from the house prevents water pooling on the finished patio.
- Furniture and shade structures should come after the hardscape is finished, not before, since the final footprint shapes what fits.
- Skipping proper edging around a gravel or paver patio is the most common reason budget patios look unfinished within a year.
What a budget backyard patio actually requires
A budget backyard patio requires three layers done in order: a compacted base for stability, a defined edge to contain the material, and a surface, gravel, pavers, or stain, chosen to fit the budget. Skipping the base to save money upfront usually costs more in repairs later.
Unlike a poured concrete slab, a DIY gravel or paver patio doesn’t need heavy equipment or a contractor, just a compacted sub-base, a layer of coarse gravel, and either loose fine gravel or pavers on top. The tradeoff is labor. A weekend or two of digging and leveling replaces the cost of hiring it out.
Thirteen backyard patio ideas that fit a real budget
A loose pea gravel patio
Pea gravel over a compacted base is one of the least expensive true patio surfaces, typically running under 5 dollars per square foot in materials. It drains well and needs no cutting or fitting, though it does require edging to keep gravel from migrating into the lawn.
A DIY concrete paver patio
Standard concrete pavers laid over a sand-and-gravel base give a clean, level surface without pouring concrete on site. Budget roughly 8 to 15 dollars per square foot including base materials, and rent a plate compactor for a day rather than buying one.
A stained or painted existing concrete slab
If a plain concrete slab already exists, staining or painting it is far cheaper than replacing the surface entirely. Use a concrete-specific stain or exterior floor paint rated for outdoor traffic, and seal it afterward for durability.
A pallet deck platform
Reclaimed pallets, sanded and sealed, can form a raised deck platform over an uneven or grassy area without any digging. This works best on a small footprint, since pallets alone aren’t rated for heavy furniture without additional support underneath.
A gravel patio with a paver border
Combining loose gravel in the center with a single row of pavers as a defined border keeps material costs low while still giving the space a finished edge. The paver border also doubles as a mowing strip if the patio sits against a lawn.
A shade sail instead of a permanent structure
A triangular or square shade sail, anchored to the house and one or two posts, costs a fraction of a pergola while cutting direct sun significantly. Choose a UV-rated fabric and anchor points rated for wind, since a loose shade sail can act like a kite in a storm.
A fire pit as the patio’s central feature
A simple ring of fire-rated pavers or a portable fire bowl gives a budget patio a focal point without needing a full outdoor kitchen or built-in feature. Keep it at least three feet from any furniture, fencing, or overhanging branches.
Repurposed furniture with new outdoor cushions
Existing indoor chairs or a bench, if the frame is solid wood or metal, can move outdoor with a coat of exterior paint and a set of weather-resistant cushions. This costs far less than buying new outdoor furniture outright.
A vertical pallet or crate herb garden along the edge
Mounting a few crates or a pallet planter along the patio’s border adds greenery without taking up floor space on the patio itself. It works especially well as a privacy screen along a fence line.
String lights on repurposed posts
Instead of buying dedicated light poles, string lights can run between two reused fence posts or a single post and the house. This keeps the lighting layer inexpensive while still extending the patio’s use into the evening.
An outdoor rug over gravel or pavers
A durable, UV-resistant outdoor rug placed over the finished surface adds a defined seating zone and softens the look of bare gravel or concrete pavers. Choose a flat weave that won’t trap gravel underneath and become uneven.
A DIY privacy screen from reclaimed wood
A simple slatted screen built from reclaimed fence boards adds privacy from neighbors without the cost of a full fence extension. Space the slats about an inch apart for airflow while still blocking direct sightlines.
A gravel fire pit seating circle as a secondary zone
For larger backyards, a small secondary gravel circle around a fire pit, separate from the main patio, extends usable space without expanding the main hardscape footprint. Connect the two zones with a simple stepping-stone path.
Materials, costs, and the details that matter
Pro tip: rent a plate compactor for the base layer even on a small patio. Skipping proper compaction is the single biggest reason DIY patios shift, sink, or develop low spots within the first year, and rental typically costs less than 50 dollars for a weekend.
| Patio surface | Typical cost per square foot | Skill level | Best for |
| Loose pea gravel | Under 5 dollars | Beginner | Casual seating areas |
| Concrete pavers | 8 to 15 dollars | Intermediate | Defined, level patios |
| Stained existing slab | 2 to 6 dollars | Beginner | Homes with existing concrete |
| Pallet deck platform | 3 to 8 dollars | Intermediate | Small, uneven footprints |
The base-border-furnish method and a real example
I follow what I call the base-border-furnish method on every budget patio build. Base means compacting the ground first, gravel or sand, before anything else touches it. Border means installing edging, plastic, metal, or a paver row, to contain the surface material and keep it from creeping into the lawn. Furnish means adding furniture, shade, and lighting only after the hardscape is fully finished. Doing these out of order is what leads to wasted purchases and uneven results.
I built a 10 by 12-foot pea gravel patio in a backyard corner over one long weekend, spending close to 320 dollars on gravel, edging, and a compactor rental. I’d originally planned to buy a full patio furniture set before starting, but held off until the gravel was down and compacted. Good thing I did. The finished footprint ended up almost two feet narrower than planned once the edging was in, and the furniture set I’d nearly bought wouldn’t have fit.
Isn’t a DIY paver patio too much physical work for a weekend? For a small to mid-size patio, generally under 150 square feet, one focused weekend is realistic for a beginner with a helper. Larger footprints usually need two weekends, mostly because base compaction takes longer than people expect.
Won’t a gravel patio look messy compared to poured concrete? Not if it’s properly edged and the base is compacted evenly. A clean border and a level surface make loose gravel read as intentional, while an unedged patio is what actually looks unfinished, regardless of the material underneath.
Common mistakes that make budget patios fail early
Skipping the compacted base layer
Building directly on unprepared soil leads to sinking, shifting, and uneven surfaces within months. Fix: always compact a gravel sub-base before adding pavers or a top layer of fine gravel, even on a small footprint.
Ignoring drainage slope
A perfectly flat patio against the house can pool water after rain and eventually damage the foundation nearby. Fix: build in a slight slope, about a quarter inch per foot, sloping away from the house.
Buying furniture before finishing the hardscape
Furniture bought before the patio’s final footprint is set often doesn’t fit once edging and borders are in place. Fix: finish the surface and borders first, then measure the actual usable space before shopping.
Using the wrong edging, or none at all
Skipping edging lets gravel or paver material spread into the lawn over time, undoing the clean line you built. Fix: install rigid plastic, metal, or a paver border around the entire perimeter before filling the surface material.
Skipping a shade plan
A patio built without any shade consideration often goes unused during the hottest parts of the day. Fix: plan for a shade sail, umbrella, or nearby tree canopy before finalizing furniture placement.
Quick checklist before you build
- Compact a gravel sub-base before adding any surface material
- Install edging around the full perimeter before filling gravel or setting pavers
- Build in a slight slope away from the house for drainage
- Measure the finished footprint before buying furniture or a shade structure
- Rent a plate compactor rather than skipping compaction to save time
FAQs
What is the cheapest way to build a backyard patio?
Loose pea gravel over a compacted base is typically the least expensive true patio surface, often under 5 dollars per square foot in materials. It requires edging to stay contained but needs no cutting or specialized tools.
Do I need a permit for a DIY patio?
It depends on your local building codes and the patio’s size, so check with your municipality before starting. Many at-grade gravel or paver patios under a certain square footage don’t require a permit, but larger or raised structures often do.
How much does a DIY paver patio cost?
Materials for a DIY concrete paver patio typically run 8 to 15 dollars per square foot, including the base layer, sand, and pavers themselves. That’s usually well under half the cost of professional installation for the same footprint.
Is gravel or pavers cheaper for a patio?
Loose gravel is generally cheaper per square foot than pavers, since it requires no cutting or precise fitting. Pavers cost more upfront but offer a more defined, walkable surface that some homeowners prefer for furniture placement.
Can you build a patio without professional help?
Yes, a gravel or paver patio under about 150 square feet is a realistic weekend project for a beginner with basic tools and a rented plate compactor. Larger footprints or patios requiring drainage work may benefit from at least a consultation.
Final thoughts
A backyard patio on a budget comes down to sequence: base first, borders second, furniture and decor last. Follow the base-border-furnish method, measure before you buy furniture, and the whole project stays on budget from the ground up. For more budget-friendly outdoor projects, browse the rest of the HomeDecorIdeas guides.