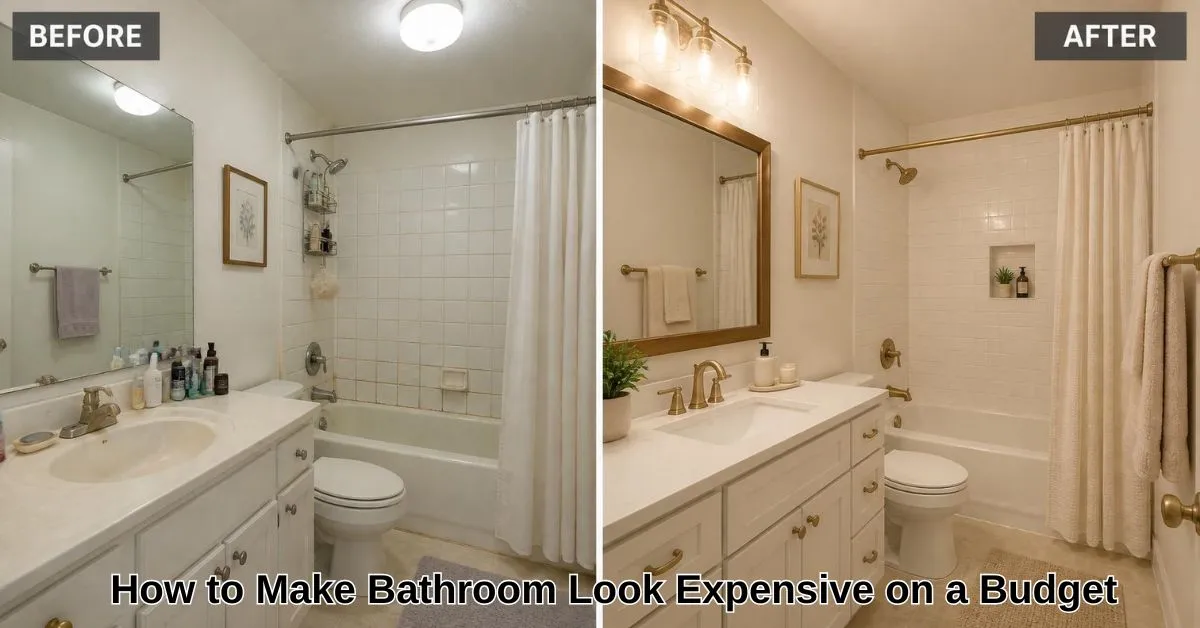
How to make bathroom look expensive on a budget comes down to three things most people skip: clean grout lines, matched metal hardware, and layered lighting instead of one harsh overhead bulb. None of those require a renovation. A weekend and a mid-range budget, usually under 200 dollars, gets you most of the way there.
Most bathrooms don’t look cheap because of the fixtures themselves. They look cheap because of small, fixable neglect: yellowed caulk, mismatched hardware finishes, a single flat light source, and clutter on every surface. Fix those four things before you buy a single new item.
The mistake I see in almost every bathroom, expensive homes included, shows up near the end of this guide. It’s the one upgrade people forget because it doesn’t feel like decorating.
Key takeaways:
- Clean, white grout and fresh caulk do more for a “high-end” feeling than any new fixture.
- Matching your metal finishes, faucet, hardware, and light fixture, reads as intentional rather than cheap.
- Layered lighting, ambient plus a warm accent, replaces the flat glow of a single overhead bulb.
- A monochrome or two-tone palette makes a small bathroom look pulled together instead of busy.
- Textiles matter more than people expect: a plush bath mat and matching towels change the whole feel.
- Regrouting or recaulking a small bathroom typically takes half a day and costs under 40 dollars in materials.
What actually makes a bathroom look expensive
A bathroom reads as expensive when its surfaces are clean, its finishes match, and its lighting is layered rather than flat. None of that requires new fixtures. It’s mostly maintenance and coordination, the kind of detail hotels and showrooms get right and most homes skip.
Three factors drive the perception: surface condition, finish consistency, and light quality. Grimy grout or yellowed caulk signals neglect faster than any outdated fixture does. Mismatched metals, a brushed nickel faucet next to matte black hardware, read as accidental rather than styled. And a single cool-white overhead bulb flattens everything else you’ve done. Fix those three and the room already looks different before you spend a cent on decor.
Ten upgrades on how to make bathroom look expensive on a budget
Refresh the grout and caulk
Yellowed grout and cracked caulk are the single fastest tell of a dated bathroom. A grout pen or a full re-grout with a bright white, stain-resistant grout takes a weekend and costs under 30 dollars for a standard tub surround. Recaulk the tub and sink edges at the same time; they wear out together.
Match your metal finishes
Pick one metal, matte black, brushed nickel, or warm brass, and carry it across the faucet, cabinet hardware, towel bar, and light fixture. I think matte black ages better than polished chrome in most bathrooms, because it hides water spots that show up within days on shiny chrome. Swapping just the hardware and towel bar runs 40 to 80 dollars in most mid-range budgets.
Layer your lighting sources
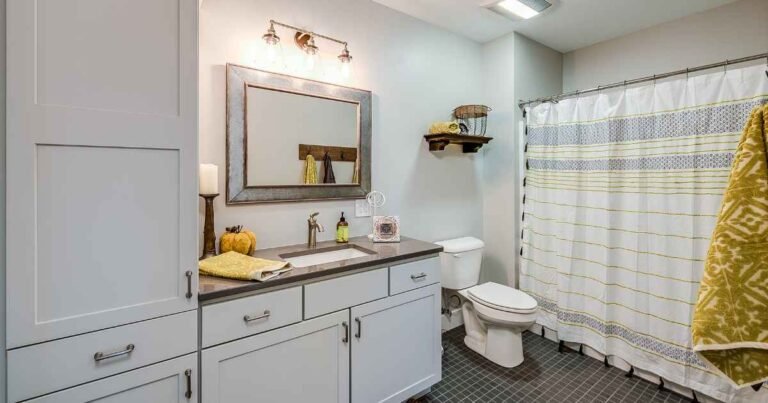
A single overhead light flattens a room and throws harsh shadows across faces at the mirror. Add a warm-toned sconce or two on either side of the mirror, around 2700K, and keep the overhead on a dimmer if your wiring allows it. The layered glow does more for a spa feeling than any new tile.
Upgrade the mirror
A basic builder-grade mirror is one of the fastest tells of an unrenovated bathroom. A framed mirror, even a simple black or brass frame added over an existing flat mirror, changes the entire wall’s presence for around 30 to 60 dollars.
Swap the shower curtain or door hardware
A vinyl shower curtain with a printed pattern reads budget instantly. A solid linen-look curtain in white or a muted neutral, paired with matching metal rings, looks closer to a hotel bathroom for well under 50 dollars.
Add a floating shelf or ladder rack
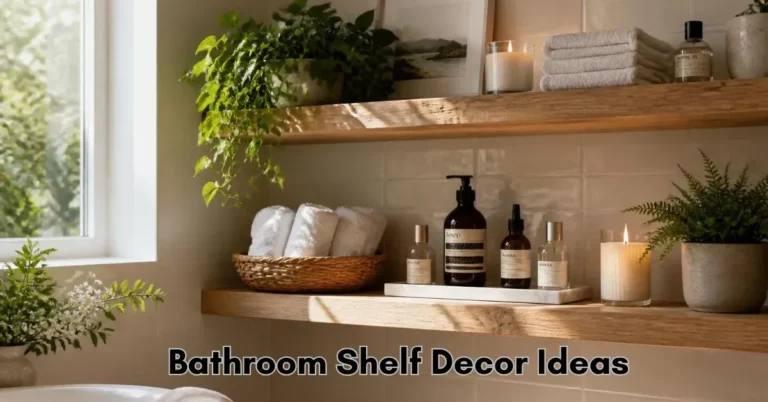
Open storage with folded towels and one or two plants adds warmth without clutter. Keep it to three or four objects per shelf; anything more starts to look busy rather than styled.
Repaint in a durable, matte-adjacent finish
A fresh coat in a warm greige, not a cool gray, warms up most bathrooms instantly. Use a satin or semi-gloss finish for moisture resistance, since true matte paint doesn’t hold up well against steam and splashes.
Upgrade the bath mat and towels
Thin, mismatched towels are an easy tell. A plush, matched towel set in one or two colors, plus a thicker cotton bath mat, upgrades the tactile feel of the whole room for around 40 dollars.
Add one plant or a small stack of objects
A single trailing plant, real or a convincing faux, softens hard bathroom surfaces. Pair it with a small stack of two or three books or a candle on the counter for texture without clutter.
Declutter the counter
An empty, or nearly empty, counter with one or two intentional objects reads as expensive. A counter crowded with bottles, tubes, and daily-use items reads as lived-in but not styled, so store the daily items in a drawer or cabinet.
Budgets, materials, and the details that matter
Pro tip: spend your first 50 dollars on grout and caulk before anything else. It’s the least visually exciting upgrade on this list and the one with the biggest before-and-after gap, because it fixes the thing your eye notices first, whether you consciously register it or not.
| Upgrade | Typical cost range | Time needed | Visual impact |
| Grout and caulk refresh | 20 to 40 | Half a day | High |
| Matched hardware and towel bar | 40 to 80 | 1 to 2 hours | High |
| Layered lighting (sconces) | 30 to 90 | 1 to 3 hours | High |
| Framed mirror upgrade | 30 to 60 | 30 minutes | Medium to high |
| Textiles (towels, bath mat) | 30 to 50 | Instant | Medium |
| Fresh paint | 30 to 60 | Half a day | Medium |
The Grout-Glow-Grip method and a real example
Here’s the framework I use on every budget bathroom project, the Grout-Glow-Grip method. Grout covers surface cleanliness: grout lines, caulk, and grime. Glow covers lighting: layering warm light instead of relying on one flat source. Grip covers hardware: matching every metal touchpoint in the room. Hit all three and the bathroom reads as finished, even if nothing structural changed.
I used this exact method on a rental bathroom that had a working but dated setup: chrome fixtures, yellowed grout, one overhead bulb. Over one weekend, I regrouted the tub surround, swapped the towel bar and cabinet knobs to matte black, and added two warm-toned sconces beside the mirror. Total spend landed around 140 dollars. The room didn’t get a single new fixture that cost more than 40 dollars on its own, but the combined effect made visitors ask if we’d renovated.
Won’t cheap hardware just look cheap again in a year? Usually not, if you pick solid metal rather than plated plastic. Matte finishes in particular hide the wear that shows up fastest on cheap chrome, so a modest hardware budget still holds up.
Isn’t regrouting too much work for such a small payoff? It feels that way before you do it, but grout is the detail your eye registers first, even subconsciously. A half-day project with a 30-dollar grout pen usually outperforms a 200-dollar fixture swap for visual impact.
Common mistakes that keep a bathroom looking cheap
Mixing metal finishes
A brushed nickel faucet next to matte black hardware reads as unintentional. Fix: pick one finish and carry it through every fixture in the room, even the toilet paper holder.
Skipping the caulk
Fresh grout next to yellowed, peeling caulk still looks neglected. Fix: always refresh caulk and grout together; they age at the same rate and should be redone together too.
Relying on one overhead bulb
A single cool-white bulb flattens the room and makes skin tones look harsh in the mirror. Fix: add at least one warm-toned side light near the mirror, ideally on a separate switch.
Overcrowding the counter
Too many bottles and tubes on display reads as cluttered, not curated. Fix: store daily-use items in a drawer or cabinet and leave one or two intentional objects out.
Ignoring scale
A tiny mirror on a large wall, or an oversized rug in a small bathroom, throws off the whole room’s proportions. Fix: measure the wall or floor space before buying and size up or down accordingly.
Quick checklist before you start
- Refresh grout and caulk in the tub, shower, and sink areas
- Pick one metal finish and match faucet, hardware, and light fixture to it
- Add at least one warm-toned light source near the mirror
- Swap thin towels and a printed shower curtain for solid, matched textiles
- Clear the counter down to one or two intentional objects
FAQs
What makes a bathroom look expensive?
Clean grout and caulk, matched metal finishes across every fixture, and layered lighting instead of a single flat bulb do most of the work. These details matter more than the price of any individual fixture.
How can I upgrade my bathroom cheaply?
Start with grout and caulk, since they’re the least expensive fix with the biggest visible payoff. Then match your hardware finishes and add a warm light source near the mirror before considering bigger purchases.
Does grout color matter for looking expensive?
Yes. Bright white or a clean, consistent grout color reads as fresh and maintained, while yellowed or stained grout is one of the fastest signals of a dated bathroom, regardless of how new the fixtures are.
What lighting makes a bathroom look luxurious?
Warm-toned light, around 2700K, layered near the mirror rather than relying on a single overhead fixture. Sconces on either side of the mirror reduce harsh shadows and give the room a softer, hotel-like glow.
Can peel-and-stick tile look expensive?
Good-quality peel-and-stick tile can look convincing on a backsplash or accent wall if the pattern and grout lines are subtle rather than glossy or overly graphic. Keep it away from high-moisture areas like the shower floor.
Final thoughts
A bathroom doesn’t need new fixtures to look expensive. It needs clean grout, matched hardware, and lighting that flatters instead of flattens. Start with the Grout-Glow-Grip method, tackle one layer this weekend, and the room will already feel different by Monday. For more room-by-room budget upgrades, browse the rest of the Home Decor Ideas guides.