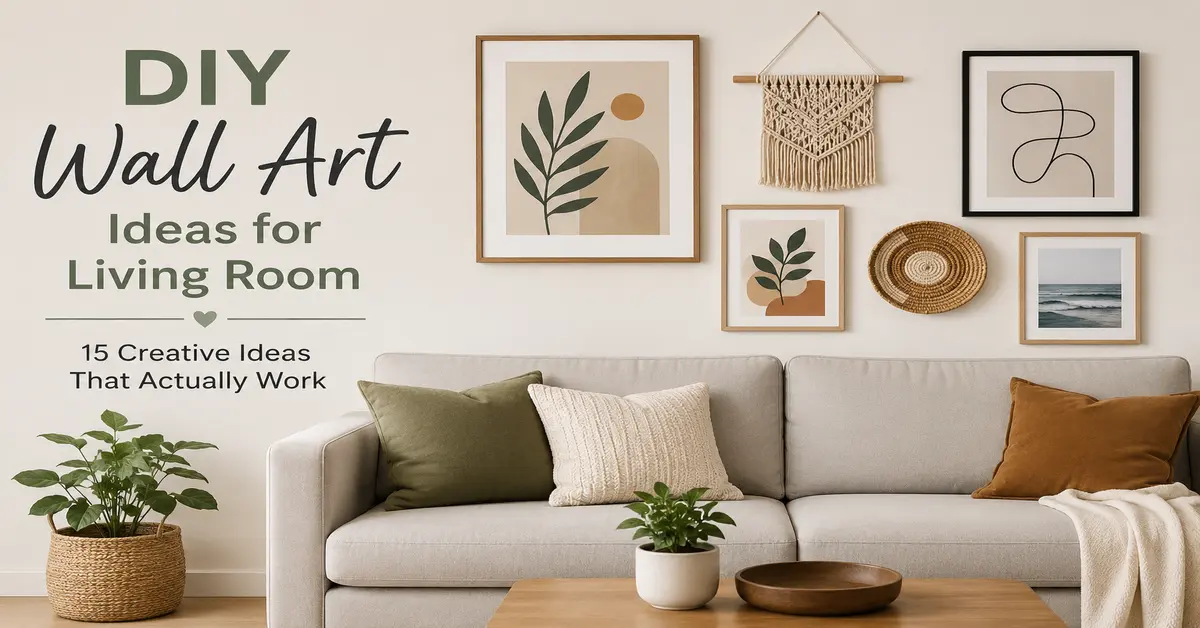
Your living room walls are blank, and every idea you’ve pinned online looks either too complicated or too generic. You know art will pull the room together, but getting it wrong means patching holes and starting over. This guide cuts through the noise: 15 DIY wall art ideas for living room spaces, with real dimensions, honest budget estimates, and the one placement mistake I see in almost every home. Stick around for the last section — it’s the thing that separates DIY that looks homemade from DIY that looks intentional.
Key takeaways:
- Hang all wall art so the center of the piece sits 57–60 inches from the floor — this is the universal eye-level rule
- For art above a sofa, the total width of your artwork should equal roughly two-thirds of the sofa’s width
- The cheapest DIY projects (washi tape, pressed botanicals, abstract canvas) cost $8–$35 and take under two hours
- Texture is the single most underused element in DIY wall art — it reads as expensive and adds acoustic warmth to a room
- A gallery wall works best when you treat the whole arrangement as one unit rather than individual pieces
- The 3-Zone Wall Art Method (explained below) is what most competitor articles skip, and it’s why some arrangements look polished while others look accidental
What makes DIY wall art look good in a living room
DIY wall art ideas for living room projects succeed or fail based on three things: scale, placement, and cohesion. Get all three right and no one can tell the art didn’t cost a fortune. Miss even one and the room feels unfinished, even with beautiful individual pieces.
Scale means sizing your art to the wall and the furniture beneath it — not to what looked good on your phone screen. Placement means hanging it at the right height and distance from surrounding pieces. Cohesion means that however different the individual pieces are, something ties them together: a shared color, a shared frame finish, or a shared material.
Most DIY articles cover what to make. This one covers what to make and where to put it, because both decisions matter equally.
The 2/3 sizing rule (and when to ignore it)
For any art hung above furniture — a sofa, a console table, a sideboard — your artwork or grouped arrangement should span roughly two-thirds of the furniture’s width. Above a standard 84-inch three-seat sofa, that means artwork 55–63 inches wide. One large horizontal canvas, a symmetrical pair, or a gallery arrangement that totals that span all work.
Hang it so the bottom edge sits 6–8 inches above the sofa’s backrest. Not 12 inches. Not flush to the cushions. Six to eight. That small gap keeps the art visually anchored to the sofa rather than floating somewhere in the middle of the wall.
The exception: rooms with ceilings above 10 feet. In those rooms, you can push the bottom edge up to 10–12 inches above the sofa and scale the artwork larger, since the extra vertical space needs to be addressed. A 9-foot ceiling is standard — stick with 6–8 inches.
Eye-level hanging: the rule nobody follows
Center your art at 57–60 inches from the floor. This is the museum standard, and it works in homes for the same reason it works in galleries: it puts the visual center of the piece at average eye level when standing. When you hang higher — which most people do, especially with heavy pieces — the art disconnects from the furniture beneath it and the room starts to feel like a showroom rather than a home.
15 DIY wall art ideas for living room walls
These projects are organized from lowest to highest skill level, not by style. Pick based on your available time and tools, not on how ambitious you feel at 10 pm on a Saturday.
1. Washi tape geometric wall pattern
Washi tape art is the most renter-friendly DIY you can do. Low-tack tape comes off cleanly without lifting paint, and the results look far more intentional than you’d expect. Use matte black tape to create a grid of rectangular “frames” directly on the wall, then slide printed art or postcards behind the tape edges. Or go fully abstract: create a herringbone, chevron, or simple diamond grid across a 24×36-inch section of wall. The low-sheen finish of matte washi tape reads as purposeful, not craft-project.
Budget: $8–$18 for tape. Time: 45–90 minutes.
Pro tip: Use a level and small pieces of painter’s tape as placeholder guides before committing your washi lines. The straighter the geometry, the more professional the result.
2. Abstract acrylic canvas
A stretched canvas and three colors of acrylic paint is one of the most underestimated combinations in home decor. You don’t need painting skills. The most reliable technique: block in one background color, let it dry fully (at least 45 minutes), then use a wide palette knife to drag a second and third color across in loose diagonal passes. The layered, dragged texture looks intentional and organic at the same time. For a 24×36-inch canvas, you’ll use roughly half a tube each of two accent colors.
Choose a warm greige or deep terracotta for the base if your living room leans neutral — those backgrounds anchor the room without fighting existing colors. If you want something lighter, a pale sage or warm off-white base lets the dragged accent layers pop without overwhelming.
Budget: $20–$45 (canvas + paint). Time: 2–3 hours including drying.
3. Gallery wall with mixed frames
A gallery wall is not just a collection of frames — it’s a composition. Treat the entire arrangement as a single piece of art and you’ll avoid the “random pictures taped to a wall” look that plagues most DIY attempts.
Start with your largest piece at the center or slight left of center. Work outward, keeping gaps between frames consistent at 2–3 inches. Mix frame widths (a 1-inch profile and a 2.5-inch profile side by side adds depth), but stick to one or two finishes: matte black and natural wood read together without clashing. Warm whites and warm ivories mix fine; cool whites and warm whites do not.
For art inside the frames: mix scales. A 16×20-inch print, a 5×7-inch black-and-white photo, and an 8×10-inch botanical illustration grouped together create visual rhythm that a matched set never achieves.
Budget: $25–$80 depending on frame sources. Time: 3–4 hours (including the floor-layout planning step, which is non-negotiable).
Pro tip: Lay the entire arrangement on the floor first. Photograph it from standing height. That photo shows you whether the composition is balanced before a single nail goes into the wall.
4. Macramé wall hanging
Macramé requires patience more than skill. The basic square knot and spiral half-hitch knot are the foundation of nearly every beginner pattern, and both can be learned from a 10-minute video. A 5mm natural cotton macramé cord on a wooden dowel 20–24 inches wide makes a piece that fills a reading nook or sits behind a floor lamp without competing for visual space. If you go wider — 36 inches or more — you have a statement piece that anchors the wall above a sofa.
Natural cotton in undyed cream or ivory suits most living room palettes. For something warmer, try a cotton-linen blend cord in a warm oatmeal tone. Avoid synthetic cord; it looks plasticky and holds knots differently.
Budget: $15–$30 (cord + dowel). Time: 4–8 hours for a beginner piece.
5. Pressed botanical display
Press flowers or leaves between two heavy books for 2–3 weeks. Arrange them on watercolor paper or linen fabric in a loose, asymmetric composition, then mount under glass in a simple frame. The result is quiet, organic, and completely unique — no two pressed botanical pieces are identical.
For living rooms with warm wood tones, lean into dried grasses, ferns, and eucalyptus sprigs in a wide shallow frame. For cooler, more minimal spaces, single large leaves on white watercolor paper in a thin black frame reads as graphic rather than rustic.
Budget: $12–$28 (frame + materials). Time: 20 minutes active + 2–3 weeks pressing.
6. Yarn or textile wall hanging
Hot-glue or staple-gun thick yarn onto a linen canvas in loose, sculptural loops to create a textile piece that adds acoustic softness alongside visual interest. The physical texture changes how a room sounds — a hard-surfaced living room with minimal soft furnishings will noticeably dampen ambient echo with a large textile piece. That’s a functional benefit competitors rarely mention.
Chunky wool in a warm ivory or muted rust pairs well with most sofa fabrics. Mix a thin cotton yarn in a contrasting shade through the loops for visual layering without visual noise.
Budget: $10–$25. Time: 1.5–2.5 hours.
7. Large-scale abstract pour painting
Pour paintings use the fluid interactions of acrylic paint and pouring medium to create organic, marble-like patterns you can’t achieve with a brush. Tilt the canvas as colors flow and they bloom into each other. No two are the same. The only technical requirement: thin your paints to a heavy cream consistency using a pouring medium (or 50/50 acrylic and craft glue), work over a drop cloth, and let dry for 24 hours flat before hanging.
A large 30×40-inch canvas with three colors costs under $40 to make. The same size in a gallery would be hundreds. Choose colors that pull from existing room elements — if your sofa has a warm gray fabric, dusty blue, and a warm off-white, use those in the pour.
Budget: $25–$50. Time: 1 hour active + 24 hours drying.
8. Floating shelf art ledge display
This isn’t a single piece of art — it’s a system for rotating art without patching holes. Mount one or two 36-inch picture ledges (thin floating shelves with a front lip) at staggered heights, then lean prints, small canvases, and framed photos against the wall. Swap pieces out seasonally or whenever you want a change.
The ledge itself is the DIY element: cut a 1×4 board to 36 inches, attach a 1×2 strip along the front bottom edge with wood glue and finish nails, sand smooth, and paint or stain. It costs under $15 in materials and takes an afternoon.
Budget: $10–$20 for the ledge. Art on top is interchangeable. Time: 2–3 hours including drying.
9. Botanical line art on watercolor paper
If you can trace, you can make this. Print a simple line drawing (or sketch one yourself) of a leaf, branch, or stem on watercolor paper. Use a fine-tipped pen to trace or draw, then apply a light watercolor wash behind the line work. The combination of precise ink and loose watercolor wash creates a piece that looks genuinely skilled without requiring artistic experience.
Print three versions at different scales, frame them in identical thin frames, and hang as a triptych. Consistent frame finish and consistent mounting (centered on the paper with the same mat width) makes a triptych feel like a professional print set.
Budget: $18–$35. Time: 1–2 hours.
10. Woven tapestry wall hanging
Weaving on a simple frame loom requires no previous experience and produces a result — warm, textured, handmade — that nothing you can buy in a home goods store genuinely replicates. A 12×18-inch piece woven in chunky wool with subtle color variation takes 3–4 hours and costs under $25 in yarn. A larger 24×30-inch tapestry becomes a room anchor.
Use a natural-edge branch (foraged or from a craft store) as the hanging rod instead of a dowel. The organic silhouette of an irregular branch adds a layer of visual interest that a straight rod can’t.
Budget: $15–$35. Time: 3–8 hours.
11. Stenciled canvas with bold typography
Choose a single word — a place name, a word in another language, a family name — and stencil it large across a 20×24-inch canvas in one flat color. Matte black lettering on a warm white canvas is the classic. For something more graphic, reverse it: chalk-white lettering on a near-black deep navy or charcoal ground.
Use a foam roller for stenciling rather than a brush. Rollers apply paint in a thin, even layer that won’t bleed under stencil edges. One coat is usually enough if your paint consistency is right — thicker than water, thinner than toothpaste.
Budget: $15–$28. Time: 1–2 hours.
12. Framed fabric art
Stretch a piece of fabric over a canvas frame the way you’d stretch canvas. Any fabric with visual interest works: an ikat in muted blues, a block-print cotton in warm terracotta, a linen with a subtle geometric weave. The texture of fabric against a frame reads as curated and intentional even when it’s functionally just fabric stapled to a wood frame.
This is one of the fastest ways to get large-scale art on a wall. A 24×36-inch canvas stretcher (the bare wooden frame) costs about $12. A half-yard of quality fabric costs $8–$20. Total: under $35 for large-format art that looks bespoke.
Budget: $20–$35. Time: 30–45 minutes.
13. Collage mixed-media canvas
Layer torn magazine pages, painted sections, fabric scraps, and dried botanical elements on a canvas using matte Mod Podge as both adhesive and sealer. Let layers partially overlap and let some sections show multiple underlayers. The depth of a collage — some areas revealing what’s beneath — is genuinely difficult to replicate in any other medium.
Choose a limited palette: if you’re using magazine paper, flip through and tear only pages in your chosen 2–3 colors. Random color inclusion is what makes most collages look chaotic rather than compositional.
Budget: $12–$22. Time: 2–4 hours.
14. Painted wood panel wall art
A 12×16-inch birch plywood panel from a hardware store, sanded smooth and finished with gesso, makes a painting surface with more presence and weight than canvas. Paint a simple landscape silhouette — a horizon line, tree shapes, a simple mountain range — in a limited palette of 3 colors. The hard, flat surface gives even amateur brushwork a graphic, intentional quality.
Three panels at different proportions hung in a row creates a modern triptych that costs under $30 and looks architectural rather than crafty.
Budget: $15–$30. Time: 2–3 hours.
15. Renter-friendly command strip picture display
For renters who can’t patch walls or want zero commitment, 3M Command strips (the picture-hanging variety, not the utility hooks) hold frames up to 4 pounds securely on most wall surfaces. Build a gallery arrangement using lightweight frames — thin aluminum or unglazed wood frames are significantly lighter than frames with glass — and mount entirely without tools.
The limitation: pieces over 4 pounds need wall anchors. Lightweight art on Command strips, done properly, does not damage walls when removed according to the manufacturer’s directions. This stops being reliable in rooms with high humidity (bathrooms) or on wallpaper.
Budget: Depends on art. Command strips: $6–$12 per pack. Time: 1–2 hours.
Budget and materials: what DIY wall art actually costs
Most people overestimate what good DIY wall art requires. Here’s an honest breakdown across four budget tiers.
| Budget tier | What you can make | Typical spend | Time required |
| Under $15 | Washi tape geometric, pressed botanicals, framed fabric | $8–$14 | 30 min – 2 hours |
| $15–$35 | Abstract acrylic canvas, macramé, botanical line art, yarn hanging | $15–$35 | 1.5–8 hours |
| $35–$60 | Gallery wall (3–5 frames), pour painting on large canvas, woven tapestry | $35–$60 | 3–8 hours |
| $60–$100 | Full gallery wall (8+ frames), large macramé, multi-panel floating ledge system | $60–$95 | One weekend |
Materials you’ll use across multiple projects (worth buying once):
- Acrylic paint set (10–12 colors): $12–$22
- Mod Podge matte (16 oz): $8–$12
- Canvas variety pack (5×7 through 16×20): $18–$30
- Macramé cotton cord 3mm and 5mm: $10–$18 per spool
- Washi tape multipack (matte, assorted widths): $9–$15
The 3-Zone Wall Art Method (what most rooms get wrong)
This is the framework I use when consulting on a living room that has art but doesn’t feel finished. Most guides tell you what to hang. This tells you where in relation to the whole room.
Divide your living room into three visual zones based on furniture arrangement, not wall sections.
Zone 1 is the focal zone — the main sofa wall or fireplace wall. This is where your largest, most intentional piece goes. It anchors the room. It should be 60–70% of the sofa width. Everything else in the room references this piece in some way: a color pulled from it shows up in a throw pillow, a frame finish echoes in the coffee table hardware.
Zone 2 is the supporting zone — a side wall, a console table wall, or the wall behind an armchair. Smaller in scale than Zone 1, but not timid. A single 16×20-inch framed piece or a trio of 8×10s works here. Zone 2 art adds visual interest when someone is seated in the room looking away from Zone 1.
Zone 3 is the accent zone — a shelf above a doorway, a narrow wall between windows, the space beside a bookcase. This is where small-scale, unexpected pieces live: a single pressed botanical, a small woven piece, a framed postcard. Zone 3 pieces reward close-looking. They make a room feel collected rather than decorated.
The mistake I see in almost every home: all the art ends up in Zone 1 and both the side walls are bare. The room feels like a stage set — interesting from one angle, unfinished from every other.
The case study: a 14×16-foot living room, $110 total
I restyled a friend’s 14×16-foot rental living room over one Saturday afternoon using this framework. The previous layout had three framed prints clustered above the sofa — all roughly the same size, all poorly spaced — and nothing on the two side walls.
We moved the largest print (a 24×36-inch canvas) to a solo position above the sofa, raised 7 inches above the backrest, centered. We added two 8×10-inch prints from a vintage map we cut apart, framed in thin black aluminum, for the side wall (Zone 2). For Zone 3, we mounted a small 12-inch macramé piece — made in an evening for $18 — on the narrow wall between the entryway and the window.
Total new spend: $68. Total time: about five hours including the macramé. The result looked like a professionally styled room. The key wasn’t the art. It was where the art went.
Common mistakes in DIY living room wall art (and how to fix them)
Hanging everything too high
This is the most consistent mistake in home decorating, not just with DIY art. The default human impulse is to hang things higher than eye level — possibly because we fear art getting in the way at head height. But high-hung art disconnects from the furniture beneath it and makes ceilings feel lower, not higher.
Fix: measure 57–60 inches from the floor to where you want the center of your piece. Mark it with a pencil. Hang from there, not from “where it feels right” while standing on a chair.
Choosing art that’s too small
A 5×7-inch print on a large expanse of wall looks like a mistake, not a design choice. When in doubt, go larger. A single piece that fills 60–70% of the wall width between two features (a window and a door, a corner and a light switch) reads as intentional. A small piece floating on a large wall reads as a placeholder.
Fix: before buying or making art, tape newspaper or kraft paper to the wall in the exact dimensions you’re considering. Step back 10–12 feet. Adjust until the size looks right. Only then make or order.
“Won’t a large piece make my small living room feel even smaller?”
No — and this is the objection I hear most often. One appropriately scaled large piece actually makes a small room feel larger than several small mismatched pieces. The reason: the brain reads multiple small pieces as visual clutter, which shrinks perceived space. One clear, scaled piece lets the eye rest and the room feel calmer and more spacious.
Where this backfires: if the piece has a very dark background AND the room is narrow (under 10 feet wide), it can feel oppressive. The fix is to use large-scale art with a light or medium-value background in narrow rooms and save the dark, moody canvases for rooms with at least one source of natural light on the same wall.
Mismatching everything without a unifying thread
Mixed is fine. Random is not. A gallery wall with 12 different frame finishes, four different matting styles, and no consistent color anywhere reads as chaotic regardless of how good each individual piece is.
Fix: choose one unifying element and hold it throughout: a single frame finish (all matte black, all natural oak, all white), a consistent mat color (all warm white or all no mat), or a consistent color that appears in at least half the pieces. Everything else can vary — size, subject, medium — and the wall will still read as intentional.
FAQs
What is the easiest DIY wall art for beginners?
Washi tape geometric patterns and stretched fabric art are the two easiest starting points. Both take under an hour, require minimal tools, and can be completely undone if you change your mind. Pressed botanical frames are equally simple but require the 2–3 week pressing window before you can assemble them.
How do I make DIY wall art look expensive?
Three things: consistent framing, correct scale, and matting. A $5 print from a thrift store inside a wide white mat inside a simple frame looks more expensive than a $50 print displayed without a mat in a cheap frame. Mat width should be at least 2 inches on all sides for prints up to 8×10 inches; 3–4 inches for anything larger.
Can I make large canvas wall art at home without painting experience?
Pour painting and drag-painting with a palette knife both produce large-scale results that look professional with no painting background required. Both techniques rely on the properties of the paint itself — fluid movement, texture from the knife — rather than on drawing skill.
How far apart should frames be in a gallery wall?
Keep gaps between frames at 2–3 inches throughout the arrangement. Consistent spacing is more important than the exact number — 2 inches throughout looks more intentional than some gaps at 1 inch and others at 5 inches. Use a small piece of cardboard cut to your chosen gap width as a spacer while hanging.
Is it better to hang one large piece or a gallery wall above a sofa?
Both work, and the choice depends on the room, not rules. One large piece suits minimal, modern, or Scandinavian-influenced rooms where simplicity is the point. A gallery wall suits collected, layered, or transitional spaces where personality is the point. The sizing rule applies to both: total art width at two-thirds the sofa width, bottom edge 6–8 inches above the backrest.
What art should go in a rental living room without damaging walls?
Washi tape patterns, Command strip-mounted lightweight frames (under 4 lbs per strip pair), floating ledge shelves mounted into studs (small holes, easily patched), and fabric tapestries hung from tension rods or removable hooks are all genuinely renter-friendly options. Removable adhesive picture strips have improved significantly and hold reliably on smooth-finish painted drywall.
Conclusion
DIY wall art ideas for living room walls succeed when they’re built around a plan, not assembled one impulse buy at a time. Start with Zone 1 — your main focal wall — get the scale and placement right using the 2/3 and 57-inch rules, and then add supporting pieces to Zones 2 and 3 as you make them. A single well-placed canvas or a thoughtful gallery arrangement will do more for your living room than a wall covered in things that don’t connect.
The 15 projects above range from a Saturday-afternoon washi tape project to a weekend macramé commitment. Pick what suits your available time first, your budget second, and your aesthetic third — in that order. Craft that gets finished always beats craft that stays on a Pinterest board.
For more room-by-room styling guidance, browse the full library at Home Decor Ideas — we cover everything from sofa arrangement to color theory for people who want to make considered choices, not just follow trends.