Most spring table decor ideas look more complicated than they need to be. Florist-arranged centerpieces, elaborate tablescapes with a dozen separate elements — it’s easy to assume a well-dressed spring table takes real design training.
Easy spring table decor ideas work differently. They start with one foundation layer, one low focal point, and small scatter accents placed outward from the center. Three layers. That’s the whole system. This page covers 9 specific setups, a comparison of approaches by cost and time, and the Nest-and-Spread method that organizes all of it. The mistake that makes even expensive spring decor look unfinished is in the final section.
Key takeaways:
- A spring table needs three layers to look complete: a foundation, a center focal point, and small scatter accents between place settings
- Keep centerpiece height either under 12 inches or above 24 inches — the awkward middle range blocks conversation without adding visual impact
- Foraged garden branches cost almost nothing and give a table more scale and airiness than grocery-store greenery packages
- Limit your spring palette to three colors; more than that and the table reads as scattered rather than styled
- Faux botanicals are worth the upfront cost if you’ll reuse the setup — fresh flowers are worth it for gatherings, not for everyday display
What makes a spring table decor setup easy
Easy spring table decor is about working with a clear structure rather than improvising with whatever spring items are available. A table with all three layers — a foundation cloth or runner, one compact focal arrangement, and small coordinating pieces placed outward — reads as intentional even when each individual element is simple. Remove one layer and the table looks like a starting point rather than a finished setup.
This is the most useful framing for anyone who doesn’t consider themselves a “decorating person.” The layers give you a checklist, not a creative test.
The one constraint that simplifies every spring table
Choose three colors before you buy or gather anything. Blush, sage, and ivory. Soft yellow, white, and botanical green. Pale lavender, warm cream, and terracotta. Pick three and let them guide every decision. I think this single constraint does more for a spring table than any specific product does — it means even mismatched items start to look coordinated because the color is doing the work.
9 easy spring table decor ideas
These setups range from a five-minute refresh to a 40-minute full tablescape. Each one includes a specific measurement, material, or placement rule so it’s actually actionable rather than vague inspiration.
1. Lay a linen runner as your foundation
A neutral linen runner in ivory, oat, or natural acts as the visual base the rest of the elements sit on. It defines the center zone and prevents individual items from reading as scattered. Standard runners measure 12 to 14 inches wide and run the length of the table with 6 inches of overhang at each end. On a round table, use a square cloth as a centerpiece pad instead. No full tablecloth needed.
2. Build a low horizontal centerpiece
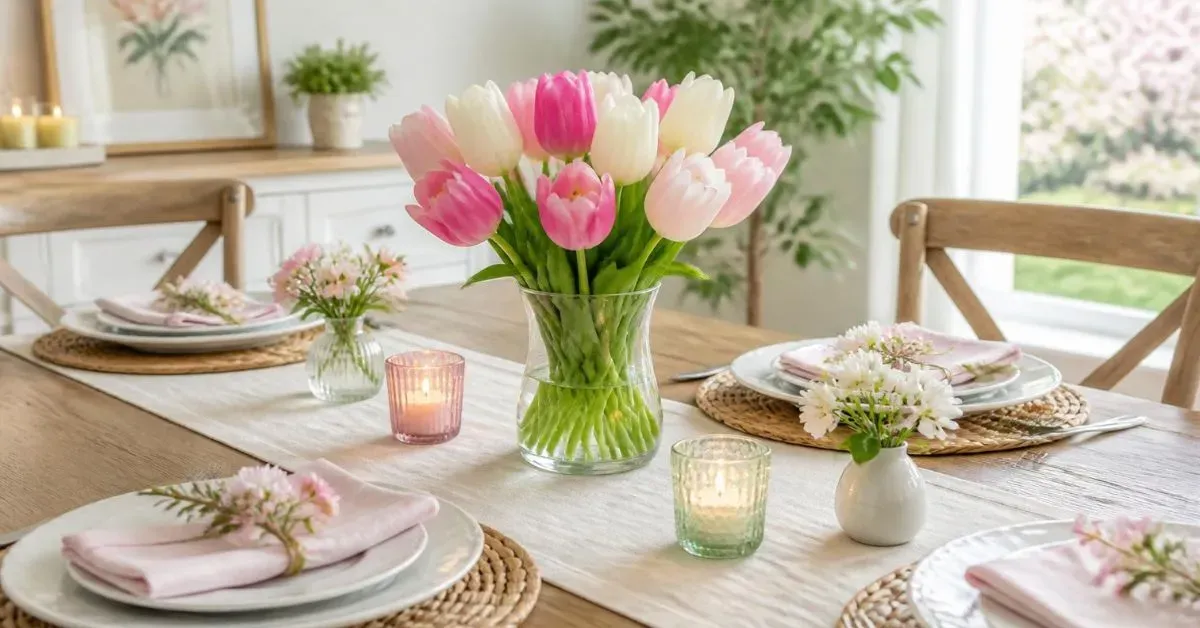
Keep your focal arrangement under 12 inches tall so people can see each other across the table. A low rectangular dish, a shallow compote, or a wide-mouthed pitcher works well. Tulips cut short and placed tightly together in a low vessel create a dense, saturated block of color that reads as deliberate. Long, loose arrangements at eye level block the table’s sightline and interrupt conversation.
3. Scatter three bud vases instead of one large bouquet
Three to five small bud vases at slightly staggered heights create more visual interest than a single large arrangement. Cut stems to 4 inches, 6 inches, and 8 inches and use the same flower type in each so it reads as a series rather than a random cluster. Group them loosely together off-center on the runner. This approach costs less than a florist bouquet and photographs better because of the depth it creates.
4. Bring foraged branches inside for scale
Flowering branches from a garden, a park, or a neighbor’s overhanging shrub give a spring table something purchased arrangements rarely achieve: genuine scale. A few branches at 18 to 24 inches tall, placed in a glass vase with smooth pebbles at the base for stability, create the airy quality that makes a table look considered. They last 5 to 10 days. And they cost nothing, which is hard to argue with.
5. Use grocery-store spring flowers strategically
Tulips, daffodils, and hyacinths from a supermarket are genuinely good spring table flowers — not a compromise. They’re better for tight, low arrangements than loose bouquets because the stems are short. A $7 bunch of 10 tulips cut to the same height in a wide vessel lasts 7 to 10 days in a cool room. Buy them closed a day before you want them open; the warmth of the house does the rest.
6. Add tea lights for evening atmosphere
A spring table in afternoon light looks different than the same table after dark. Five or six tea lights in plain glass holders, scattered between the other elements rather than lined up in a row, shift the whole atmosphere when it gets dark. I keep a bag of unscented tea lights in a kitchen drawer for exactly this reason. They cost almost nothing and work with any setup without adding visual clutter.
7. Include one natural texture
Dried moss, smooth river stones, a small piece of driftwood, a rattan coaster used as a small tray — one rough, organic texture makes spring table decor feel grounded rather than generic. It doesn’t need to be the centerpiece. Lined inside a low dish beneath flowers, placed at the base of a vase, or sitting beside the candles, a single textural element adds the kind of depth that purely floral setups often lack.
8. Let the dishes do the neutral work
White or neutral dishes act as a canvas and let the decor carry the spring color. If your everyday dishes have a strong pattern or color, keep the decor simple — let the dishes be the spring element. Conflict happens when both the dishes and the centerpiece compete for visual attention simultaneously. One needs to be the background. Deciding which one upfront makes the rest of the table much easier to style.
9. Repeat one spring color in three different materials
Pick one spring color and bring it into the table in three different materials. Coral appears in tulips, a folded coral napkin, and an amber glass candle holder. Sage green appears in eucalyptus stems, a green ceramic dish, and a folded linen cloth. One color repeated across multiple materials is what makes a table look coordinated rather than assembled piece by piece from different places.
What each approach costs and how long it takes
Knowing the time and cost trade-offs before you start makes the decision faster. Here’s how the main spring table approaches compare on both.
| Approach | Estimated cost | Setup time | Lifespan | Best for |
| Foraged branches + simple vase | Free to under $5 | 30-45 min | 1-2 weeks | Budget-first setups |
| Grocery-store flowers only | Under $20 | 20-30 min | 5-10 days | Weekend gatherings |
| Faux botanical centerpiece | $30-$80 (reusable) | 15-20 min | Indefinite | Low-maintenance display |
| Dried botanicals (eucalyptus, pampas) | Under $25 | 10-15 min | Months | Long-term table styling |
| Mixed: fresh + faux or foraged | $10-$35 | 25-40 min | 1-2 weeks | Best overall visual result |
Pro tip: Buy spring flowers from a supermarket rather than a florist for a table centerpiece. Supermarket flowers are cut more recently than florist arrangements, which means they tend to last longer at home. Buy closed buds and let them open in a cool room away from direct sun — they’ll be at their best within 24 to 36 hours.
The Nest-and-Spread approach to spring tablescaping
Most spring table decor advice treats the centerpiece as the whole project. The Nest-and-Spread approach treats it as just the starting point, then asks what goes between the center and the edges.
The nest is one compact focal arrangement: a low bowl of flowers, a cluster of bud vases, or a single branch in a tall vase. It establishes the palette and scale. Everything on the table takes its visual cue from it.
The spread is everything that radiates outward: a tea light beside a place setting, a small sprig of rosemary tucked under a napkin, a single bloom laid flat beside a plate. These scattered elements connect the center to the edges and make the table feel inhabited rather than staged for a photo.
How to build a spring table using this method
- Place the foundation runner or cloth
- Set the nest in the center: one compact arrangement, kept under 12 inches tall
- Position two smaller elements (a bud vase or candle) about 8 inches out from each side of the nest
- Add one small accent at each place setting — a stem, a folded ribbon, a sprig of herb
- Step back and remove one item from the nest. Spring tables almost always look better with slightly less than you think they need
Mini case study: I set a spring table for six people in under 40 minutes using flowering branches from a neighbor’s shrub, two $5 bunches of grocery-store tulips, and bud vases I already owned. Total cost: $10. The branches gave the arrangement height; the tulips gave a saturated pink-coral. Three guests assumed the flowers came from a florist. The table looked significantly more planned than it was, which is exactly the point.
Spring table decor mistakes that make setups look wrong
These three problems appear consistently on spring tables that look almost right but don’t quite work. Each has a fix.
Choosing the wrong centerpiece height
A centerpiece between 13 and 23 inches tall on a dining table is the most common structural mistake. It’s too tall for comfortable conversation and too short to read as a deliberate statement piece. The rule: keep arrangements either below 12 inches (low and wide) or above 24 inches (tall and slender, so sightlines pass cleanly beneath it). Anything in between creates a visual block without the impact that might justify it.
Using too many colors at once
Four or five spring colors look festive on a greeting card and scattered on a table. Fix: choose three shades and hold them. If items you already own pull in different directions, use white to neutralize — white candles, white dishes, or an ivory runner absorbs competing tones and resets the composition without requiring any new purchases.
Leaving the place settings bare
A styled centerpiece with untouched place settings makes the table look half-finished. It doesn’t require formal place settings — just something at each spot that connects it to the decor. A single herb sprig, a spring-colored folded napkin, or one flower stem laid across a plate takes under two minutes per setting. That small connection is what makes the table read as complete rather than a shelf display with chairs around it.
| Do | Don’t |
| Keep centerpiece under 12 inches or above 24 inches | Use a 14-22 inch arrangement on a dining table |
| Limit the palette to three colors | Mix four or more spring shades without a neutral anchor |
| Add one accent element at each place setting | Leave place settings untouched while the center is fully styled |
| Include one rough natural texture | Use only smooth, synthetic, or perfectly uniform materials |
| Remove one item before calling the table done | Keep adding until the table feels “finished” |
Spring table setup checklist:
- [ ] Foundation layer in place (runner or defined center zone)
- [ ] Centerpiece height under 12 inches or above 24 inches
- [ ] Palette limited to three colors
- [ ] At least one natural texture included (branch, moss, stone, linen)
- [ ] One small accent at each place setting
- [ ] Tea lights or candles available for evening use
“I’m not creative — I’ll just make it look messy.” Start with one element only: a single bunch of tulips in any vessel you own. That’s already a spring table. Add one tea light beside it. Step back. That’s two elements, and it’s complete. Every addition after that is optional and additive, not corrective. The Nest-and-Spread approach works because it removes the blank-canvas pressure entirely.
“Fresh flowers die in a few days. Is it worth the effort for a table?” For a dinner party or weekend hosting, yes — the lifespan is long enough and the impact is worth it. For everyday display, use a faux botanical as the nest and add one or two stems of fresh flowers as the scatter accents. The faux piece maintains the look across weeks; the fresh stems give you the quality that faux botanicals genuinely can’t replicate. Both, combined, solve the problem.
FAQs
What colors work best for spring table decor?
Pastel palettes in blush, sage green, soft yellow, and lavender are the most common and easiest to work with. For a more contemporary feel, pair botanical green with ivory and one warm accent like coral or terracotta. Either way, limit the palette to three colors. More than three and the table starts to look scattered rather than styled.
How do I decorate a spring table on a tight budget?
Foraged branches, a $7 bunch of grocery-store tulips, and a runner you already own cover all three layers for under $15. The scatter layer — a tea light here, a sprig of rosemary at each place setting — costs almost nothing. A well-executed low-budget spring table consistently outperforms an overcrowded expensive one.
What flowers are easiest to use in a spring centerpiece?
Tulips and daffodils are the easiest starting points — widely available, long-lasting when cut correctly, and forgiving in arrangements because their stems are relatively uniform. Hyacinths add fragrance but droop faster. Ranunculus hold their shape well in low dishes. Flowering branches (cherry, forsythia, apple) give height for almost no cost if you can forage them.
Can these spring table ideas work on a coffee table?
Yes, scaled down. Replace the full centerpiece with a single bud vase or a small low bowl arrangement. Add one or two tea lights and one small natural element (a smooth stone, a sprig of greenery, a dried botanical). The same three-layer principle applies — foundation, focal point, scatter — just proportioned for a smaller surface.
Conclusion
A spring table that looks considered doesn’t need elaborate planning or an expensive flower budget. Three layers — a foundation, one low focal arrangement, and small scatter accents — do more than a table full of items placed without structure.
Start with one element. Use the Nest-and-Spread method to build outward from it. Step back and remove one thing before you’re done. That last step matters more than most people expect.
For more seasonal styling across tables, shelves, and entryways, Home Decor Ideas covers the same layered approach applied room by room throughout the home.